3DPrinterOS
Данный софт представляет собой облачную платформу, на которой объединены разные компоненты, используемые для 3Д печати. И название программы прекрасно иллюстрирует работы: подключили 3Д принтер к компьютеру, разместили в браузере и пользуйтесь.
3DPrinterOS предлагает не только нарезку модели на слои и формирование G-кода, но и ряд других полезных функций, среди которых восстановление сетки в разных вариантах, загрузка с сервиса Sketchfab.com. Возможна даже 3Д печать на оборудовании промышленного уровня. Безусловно, некоторый функционал будет доступным лишь в платных версиях программы. Однако сам производитель заверил, что в любом случае сам слайсер будет всегда бесплатным.
3DPrinterOS имеет три во многом идентичных приложения. Речь идет о Cloud Slicer, Slicer 2 и Makerbot Slicer. Первое приложение стандартное, а последнее специальное. Все приложения поддерживают огромный модельный ряд 3Д принтеров, что в целом весьма ожидаемо от обычного коммерческого продукта.
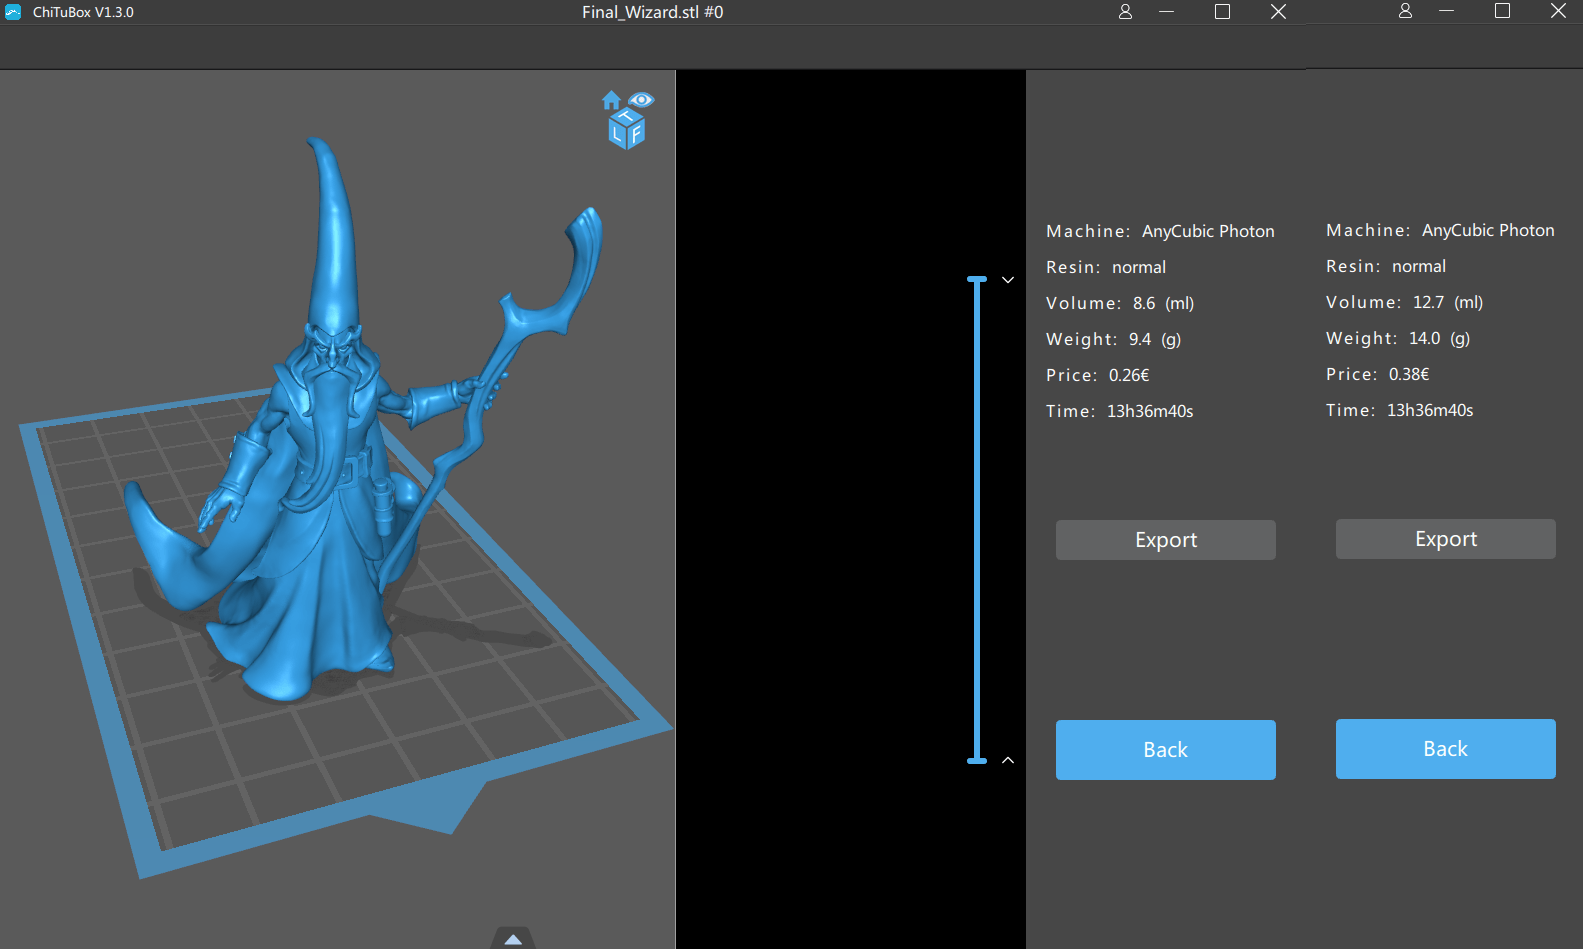
Стандартный Cloud Slicer и специальный Makerbot Slicer весьма похожи по интерфейсу и функциональным возможностям. Есть возможность между выбором уровня опытности пользователя (простой, продвинутый уровень и эксперт). Приложение также способно оценить стоимость изделия.
Slicer 2 отличается от вышеназванных приложений иным подходом. Есть список предустановок, но их можно адаптировать под свои требования. Также для ценителей тонкой настройки есть ручной режим.
Достоинства 3DPrinterOS:
Сформированный GCode можно просмотреть в специальном функционале. Можно формировать свой код JSon, если вы являетесь уверенным пользователем.
Недостатки 3DPrinterOS:
Ряд функционала является платным, а хотелось бы пользоваться всеми возможностями программы, но для компании это невыгодно, да и нечестно это будет по отношении к работе ее сотрудников.
3DPrinterOS совместим с:
- Браузер,
- Windows,
- Mac
Уровень:
3DPrinterOS может использоваться как начинающими пользователями, так и полупрофессионалами, которые хотят работать в надежной программной среде.
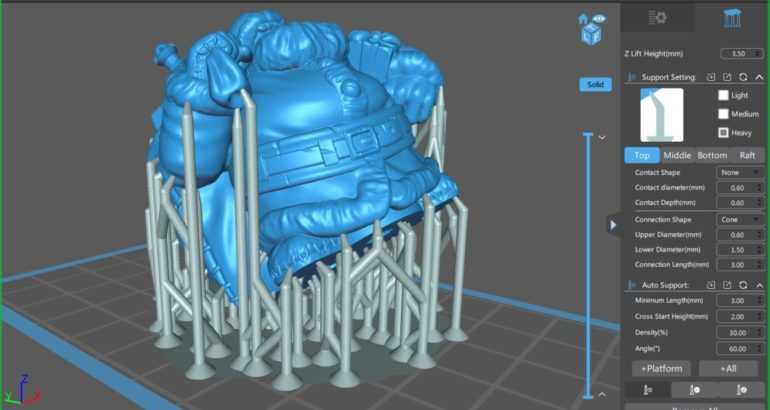
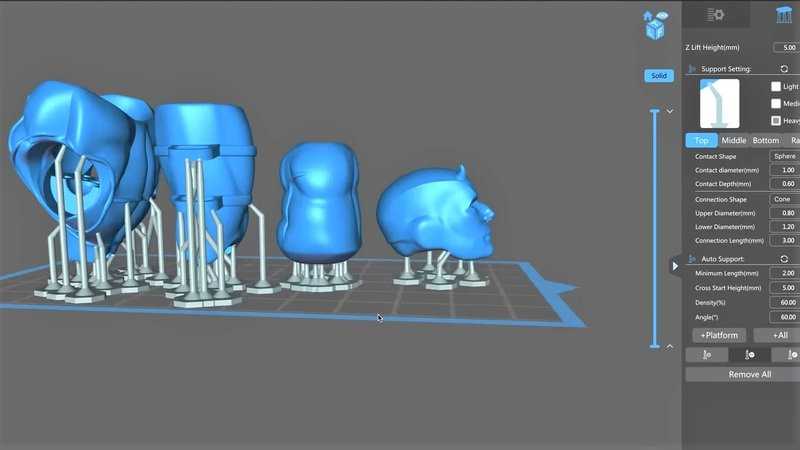
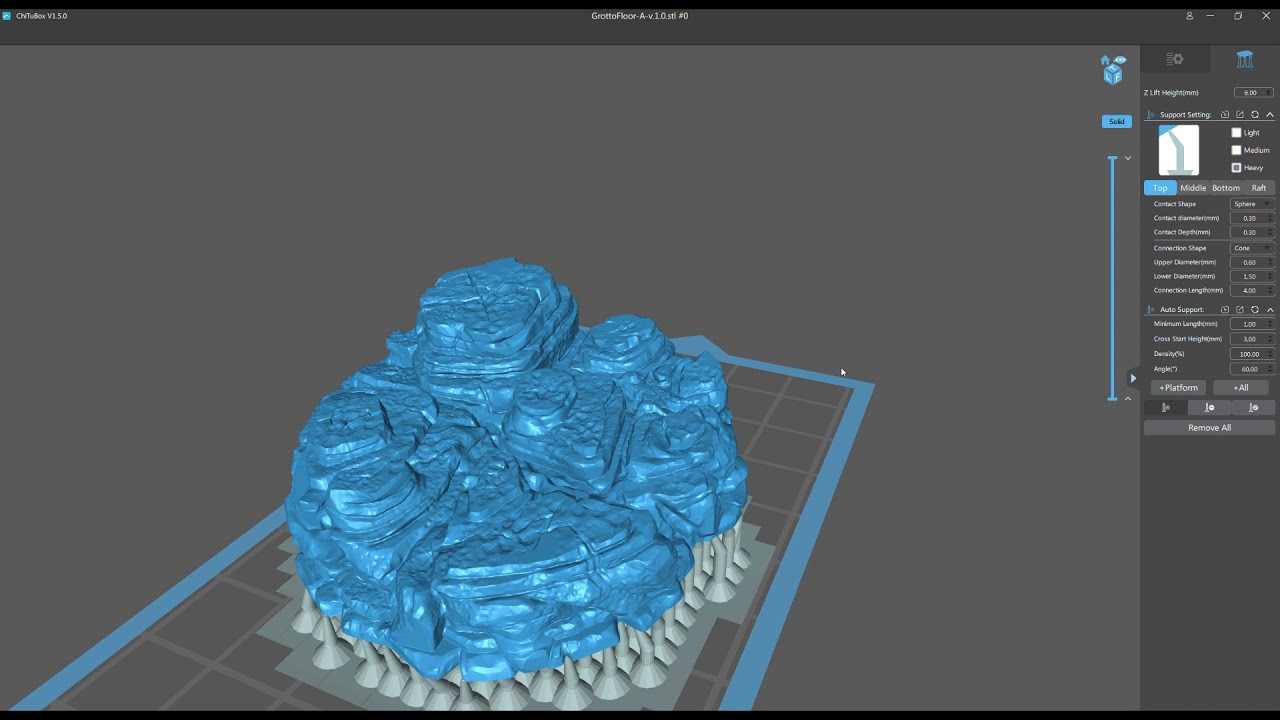
Support Settings
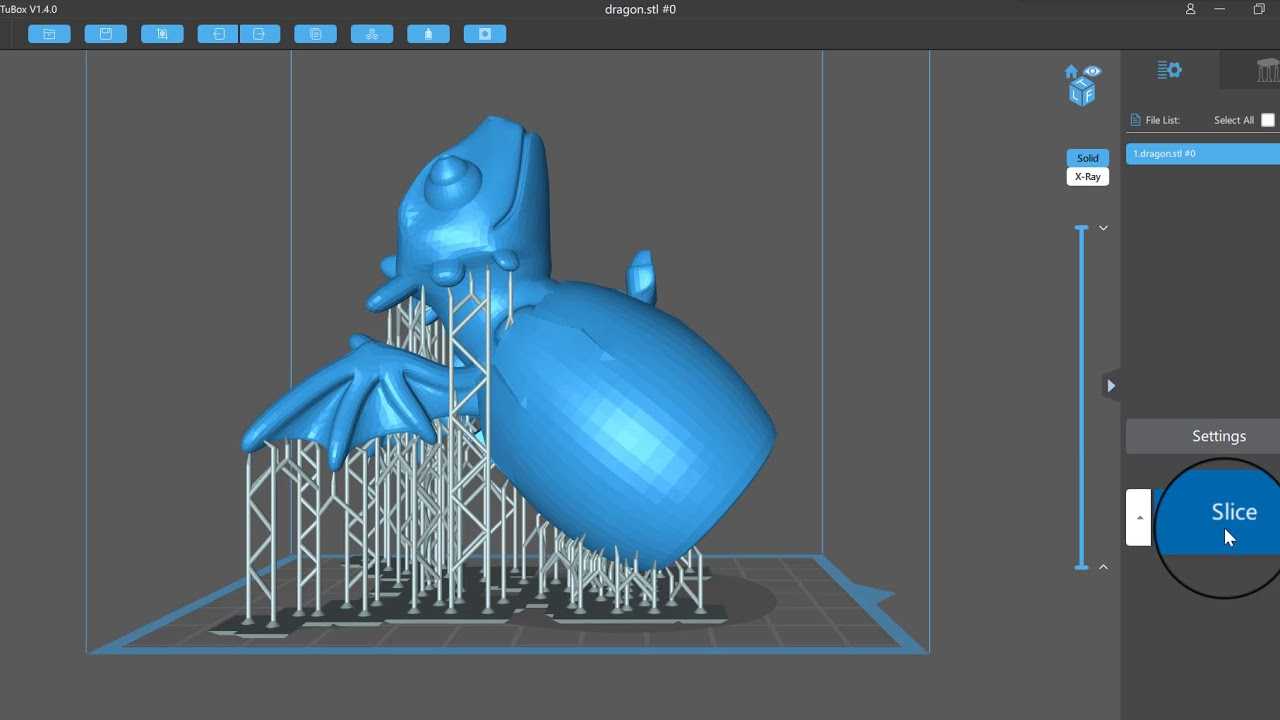
ChituBox allows for a great deal of control over the style, shape, and type of support structure that is generated. If you’re just starting out, using the “Medium” default support settings will strike a good compromise between a robust structure and a structure that will be easy to remove. Selecting “+Platform” generates support only on the platform to the model, and won’t generate any structures that originate from the model. Selecting the setting “+All” will create support structures that do start on the model, like the underside of the teeth and tongue on this cat model.
Elegoo Mars Profile – Slicer Build Area Settings (Screenshot: ChituBox)
Do you need Chitubox Pro?
So is Chitubox Pro worth $170 a year? No, absolutely not, for most people. So, in a typical use case, probably the only thing you’ll actually be using is the improved support material. Which you can generate in third-party tools as well. Chitubox Basic supports are totally usable, too, but the ones from Pro or PrusaSlicer are just more reliable in more situations, and being able to control where supports should be generated without placing every single support tower by hand is pretty nice.
But as always, if you really need those features, then you’ve got to get the version that supports them. I really hope that the Basic version stays at least as good as it is today. It wouldn’t be the first time for a company to slowly strip away features from their free offerings and eventually going “but yeah, you can pay for them”. I don’t know if there is a built-in expiry date for the current Chitubox Basic versions, but with newer versions already demanding you to for example update the printer’s firmware, which conveniently, also locks down the older printers you might have, I can see Chitu trying to go down that route. I’m not sure they would actually do that, but it would fit in with them pulling the sneaky lock-in move with the firmwares in the recent printers.
In any case, I hope that helped shed some light on what new innovations Chitubox Pro brings to the table.
Enjoying the videos? Support my work on Patreon!Product links are affiliate links – I may earn a commission on qualifying purchases (at no extra cost to you)
You can support me without spending a single penny!
Как выбрать хороший 3D-принтер для дома
https://youtube.com/watch?v=LxqGsFAPOLc
Виды-принтеров
В настоящее время существует 11 основных технологий 3D-печати, из которых лишь небольшая часть применима к домашней 3D-печати. Это моделирование методом послойного наплавления (FDM) и полимеризация в ванне (как правило, SLA, DLP, или MSLA).
-
Моделирование методом наплавления (FDM) — наиболее распространенный метод печати, используемый в настольных 3D-принтерах. Термопластичная нить нагревается и экструдируется через сопло, расплавленный пластик наносится слоями на платформу для печати. Эти слои сплавляются, и в конечном итоге образуют готовую деталь.
Такие 3D-принтеры являются лучшим выбором для домашнего мастера или изготовления учебных пособий. А многие из них используются и для более сложных задач, например создания декоративных предметов и даже костюмов.
Использование 3D-принтера FDM имеет свои преимущества. Прежде всего, это огромный выбор материалов и дешевизна самих принтеров. К тому же такие устройства просты в использовании. - В полимерных 3D-принтерах желаемая модель слой за слоем создается в ванне с жидкой фотополимерной смолой путем затвердевания смолы под ультрафиолетовыми лучами, пропускаемыми через матрицу. Стереолитография (SLA) часто используется как синоним полимеризации, но сама по себе — наряду с MSLA и DLP — является подкатегорией полимеризации в ванне. И отличается только используемым источником света.
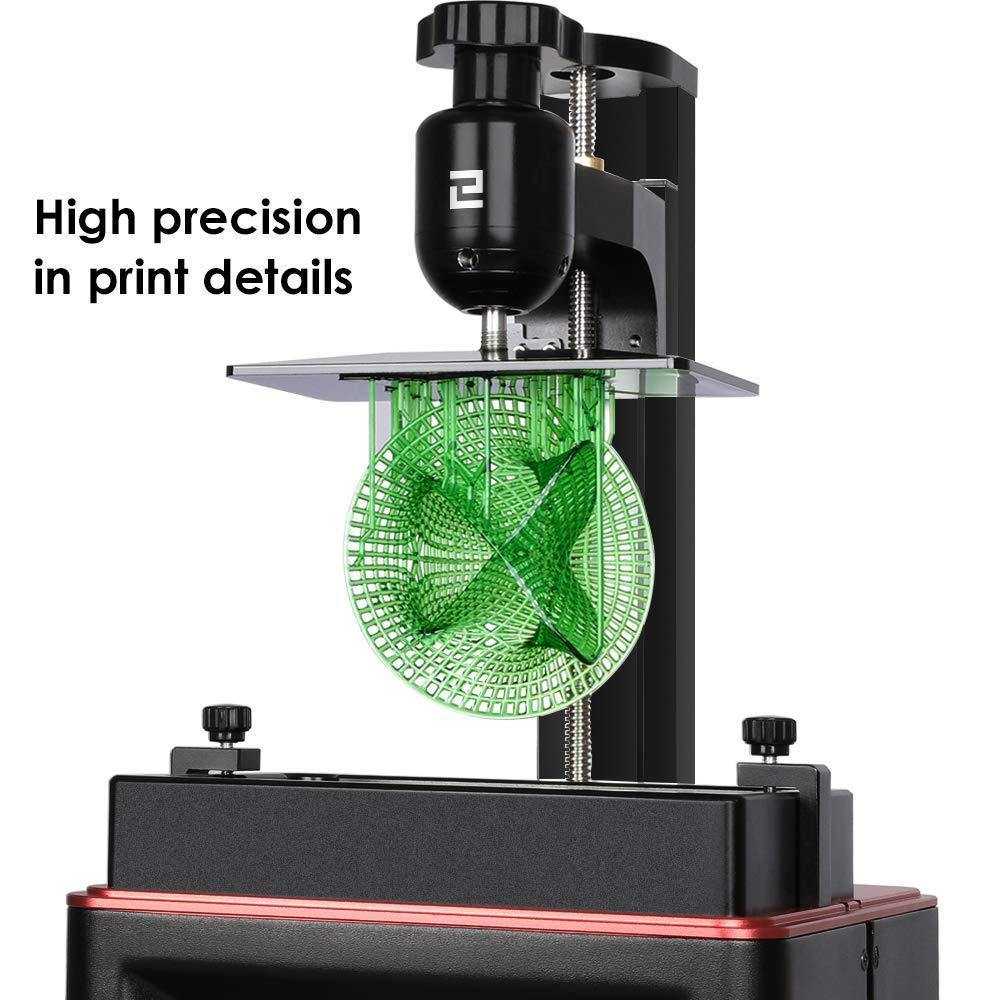
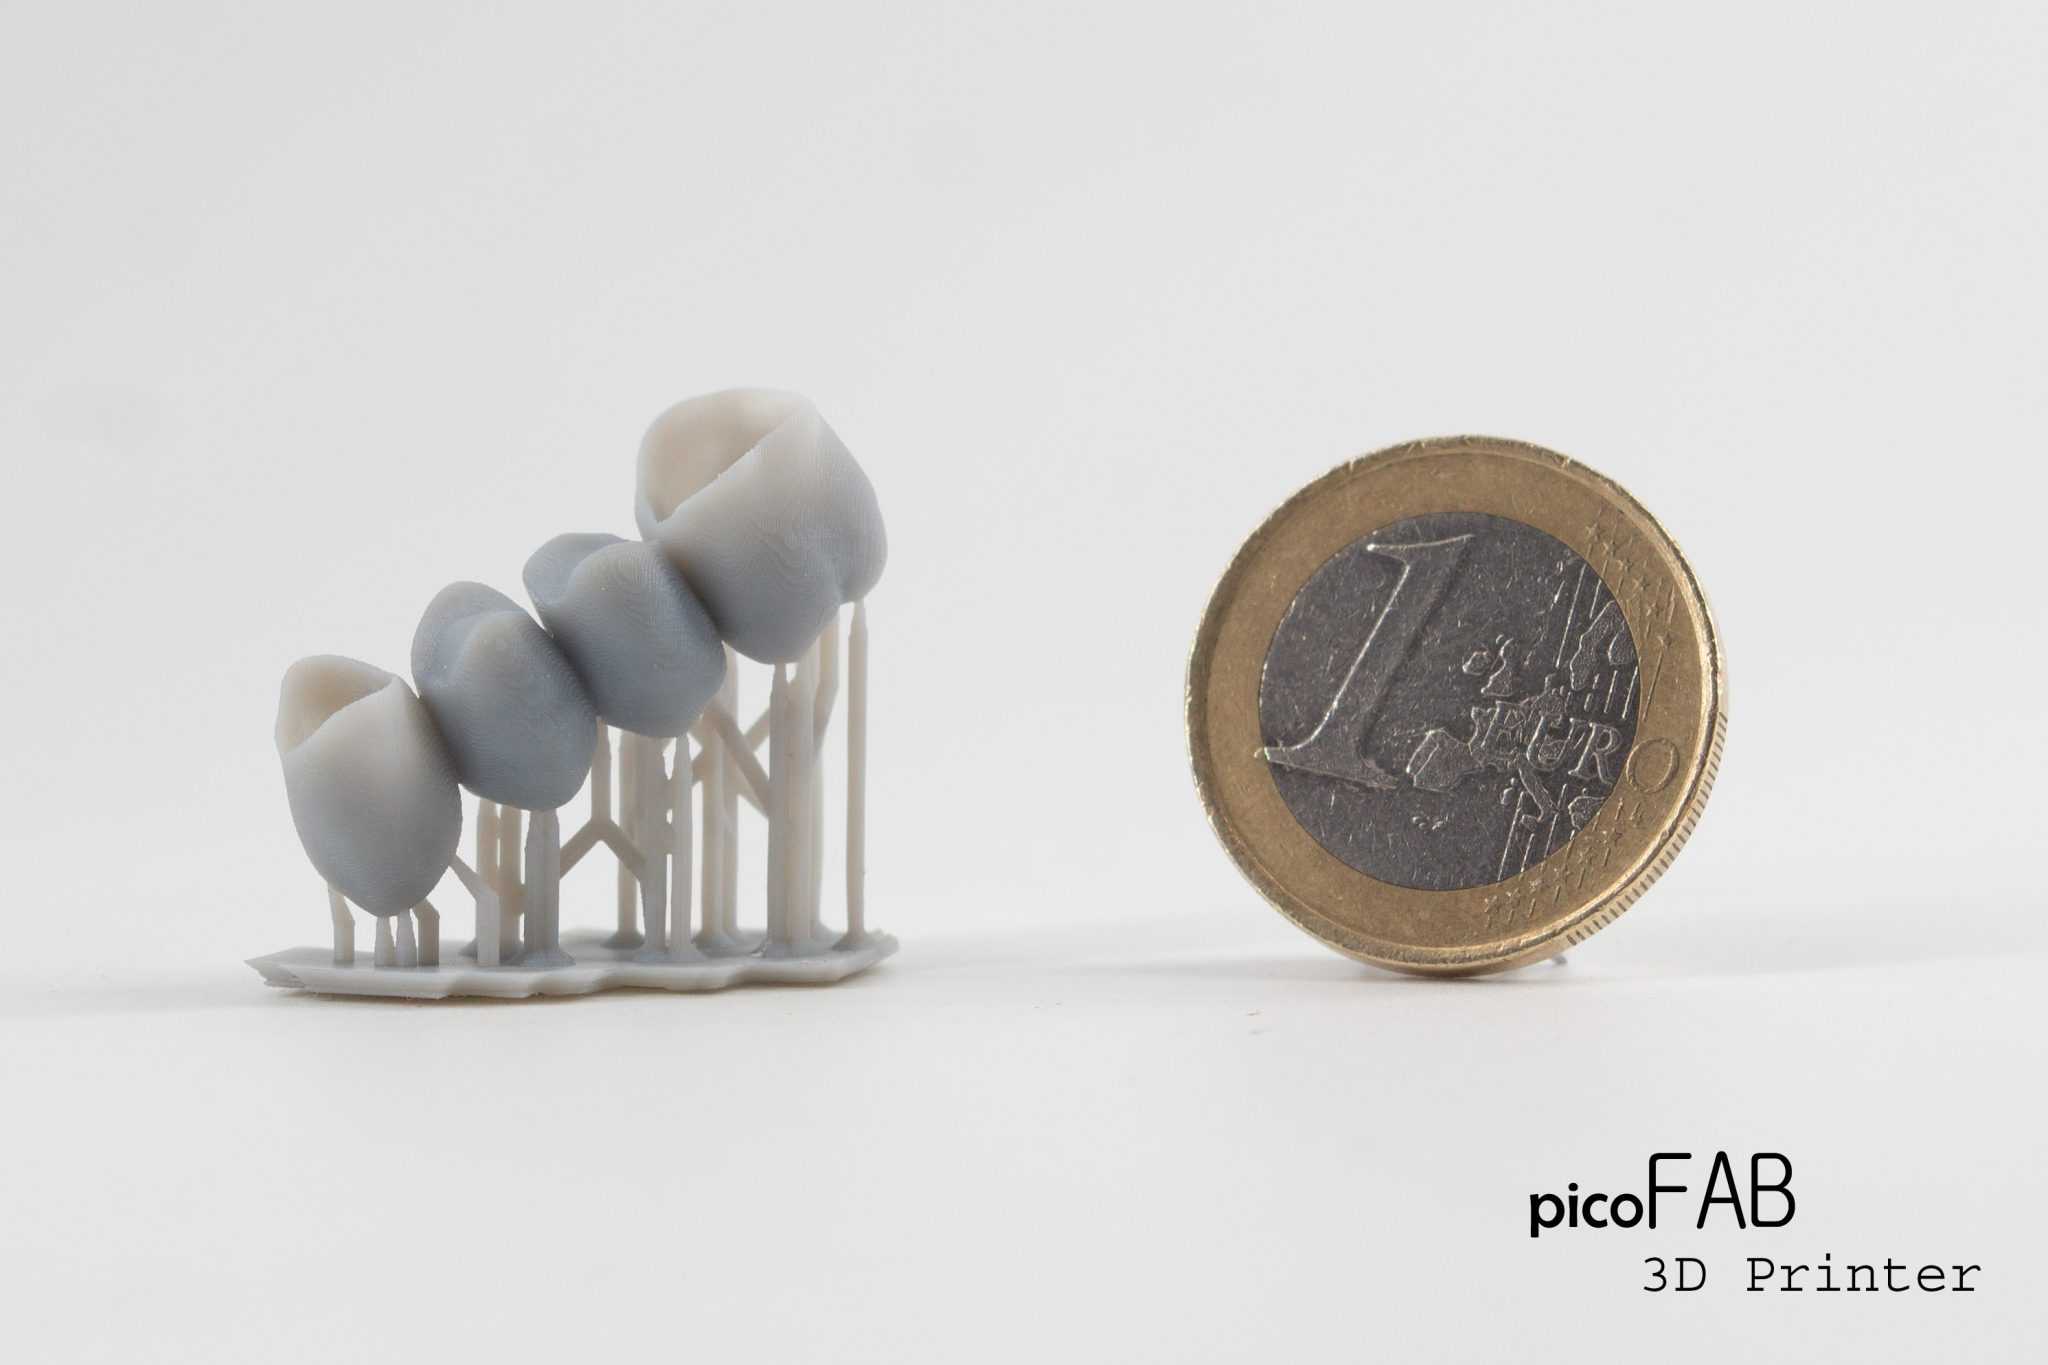
3D-принтеры на основе смолы могут отображать чрезвычайно мелкие детали, и создавать объекты с относительно гладкой поверхностью. Эта технология обычно быстрее и точнее, чем FDM, и может создавать более прочные объекты из-за повышенной адгезии слоев.
Бюджетных 3D-принтеров SLA меньше, чем 3D-принтеров FDM, однако в последние годы цены на них резко упали, и в этом топ-10 3D-принтеров есть пара недорогих вариантов.
Виды материалов
Наиболее распространенные типы филамента для FDM-принтеров:
- PLA — полимолочная кислота — это пластик растительного происхождения. Он разлагается после длительного пребывания на солнце и легко портится при чрезмерной влажности. Плавится при небольшой температуре.
- PETG — полиэтилентерефталат-гликоль — безопасный для пищевых продуктов пластик, но это не означает, что ваш 3D-печатный объект безопасен для пищевых продуктов. Принтеры FDM создают слои, которые легко задерживают влагу и бактерии. Предметы из PETG должны быть хорошо обработаны пищевой эпоксидной смолой перед контактом с пищевыми продуктами.
- ABS — акрилонитрил бутадиен стирол — известный прочный пластик. Для правильной работы с ним требуется много тепла, и лучше всего он работает с закрытым 3D-принтером, чтобы уменьшить термическую усадку пластика.
- HIPS — этот пластик обычно используется для печати поддержек, если 3D-принтер оснащен 2 экструдерами.
![]()
Фотополимерная смола – это единственный материал, подходящий для полимерных 3D-принтеров. Она токсична, детали требуется отмывать в растворителе после печати, и сушить УФ-лампой до полного затвердевания модели.

Ключевые характеристики
Самые востребованные у 3D-принтера функции включают в себя:
- Автоматическое выравнивание стола.
- Подогрев стола (без него можно работать только с PLA-пластиком). Для домашнего использования оптимальный подогрев — от 80°С до 150°С.
- Возможность печатать разными видами пластика – чем больше, тем лучше.
Что касается размера рабочей области, то покупать с запасом не стоит. И дело не только в том, что большие принтеры стоят дороже, весят больше и требуют большого пространства.
На большом рабочем столе часто возникают проблемы с усадкой пластика, его расслаиванием и искажением размеров модели. Кроме того, углы модели труднее отлепить от стола. Если вы планируете печатать небольшие фигурки, нужные детали или что-то еще из разряда «некрупных», то большой 3D-принтер ни к чему.
Есть 3D-принтеры с открытой и закрытой конструкцией.
- Первые дешевле, но печатают дольше, и у них могут возникать проблемы с усадкой и общим качеством печати ABS-деталей (они не любят перепадов температур).
- Вторые дороже, зато имеют более жесткую конструкцию, и отличаются хорошим качеством печати. Пыль и прочие нежелательные частицы не попадают как на изделие, так и на механические части принтера (значит, прослужит дольше). И безопасность у таких принтеров выше, так как человеку не так-то просто вступить в контакт с горячими частями устройства или веществами.
Также стоит обратить внимание на тип экструдера – Bowden или Direct. Если часто планируете печатать гибкими пластиками или нужна точность печати, то лучше Direct, если важна скорость печати, то тут преимущество у Bowden
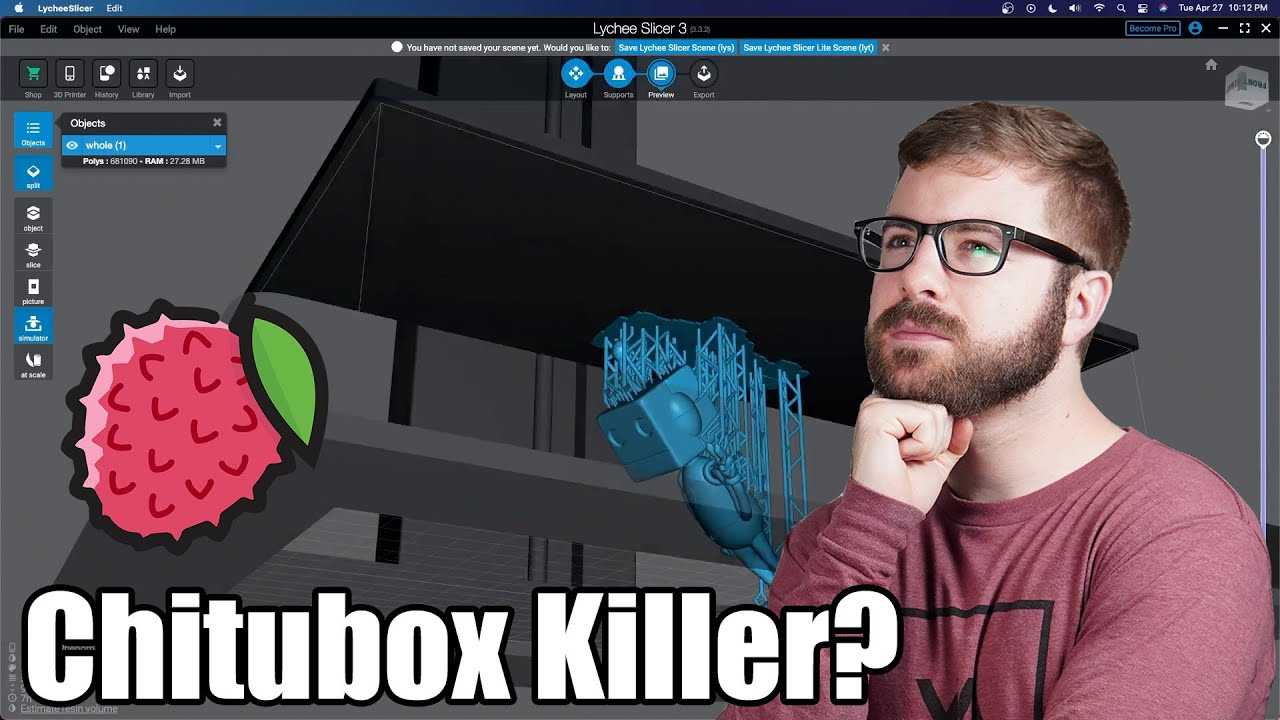
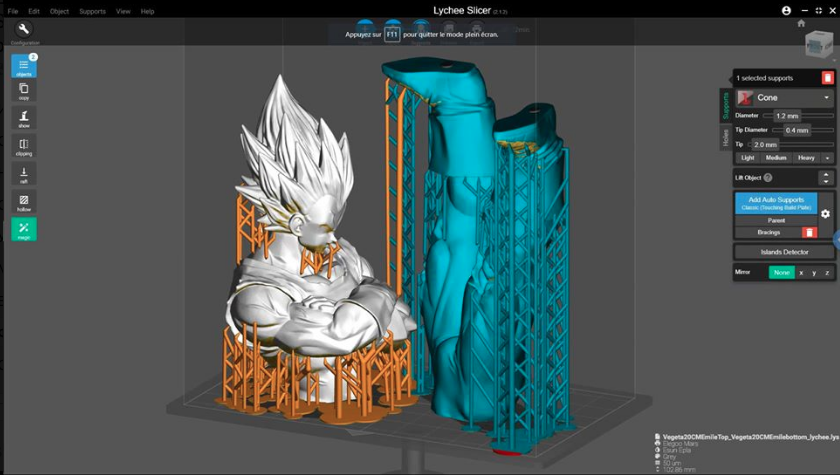
Lychee Slicer
The Lychee Slicer is quite new on the scene when compared to other original resin slicers, but because of this, they had a great framework to work from. Mango3D created this advanced slicer software which is compatible with almost all LCD and DLP 3D printers.
It’s free to use, though it has a Pro version which allows you some extra capabilities in terms of functionality, as well as being able to skip the 20-second ad for each export of a sliced file.
https://youtube.com/watch?v=hAwnRQ5rpy0
For all the features you’re getting, as well as the functionality of the software itself, the ads aren’t very bothersome.
You may be wondering, just how much is this Pro version you speak of? At the time of writing, it will set you back a respectable €2.49 per month with their yearly subscription.
They even give you a chance to use this slicer for 1 month on trial basis, so you can figure out whether its for you. I’d definitely recommend it if you are into resin 3D printing.
The Pro version gives you the following features:
- All the function of the Free edition of Lychee Slicer
- No advertising before slicing
- Advanced support editing mode (IK type)
- Multiple options for supports managements (tips, base, shapes, etc.)
- Ball-type for supports tips
- 3D hollowing and hole punching at speed
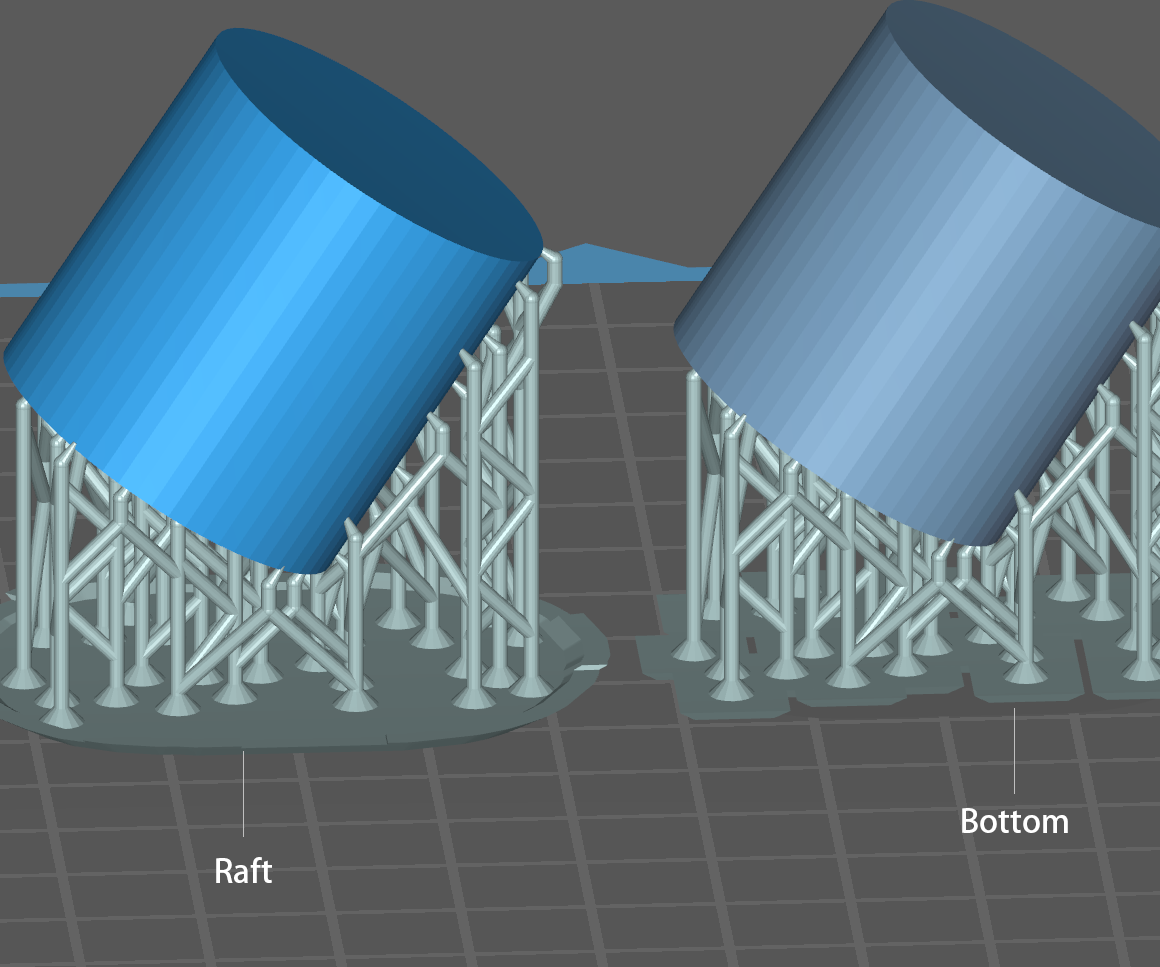
- More raft types
- Pixel perfect mode
- Variable layers
- Over-exposed supports
- 3D Measurements
- Automatic 3D Model replacement
- And more!
This slicer brings many high-quality functionalities such as creating 3D print models, adding supports by using automatic or manual settings, automatically creating the media, setting print orientation, and many more.
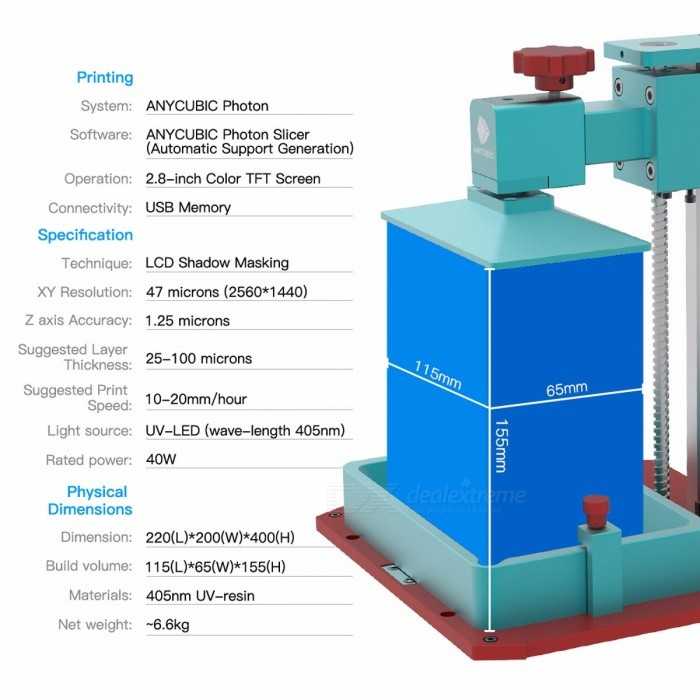
The Lychee Slicer can help you with most of the SLA 3D printers such as those Anycubic Photons, Elegoo Mars/Saturn printers, and plenty more out there so give it a go today.
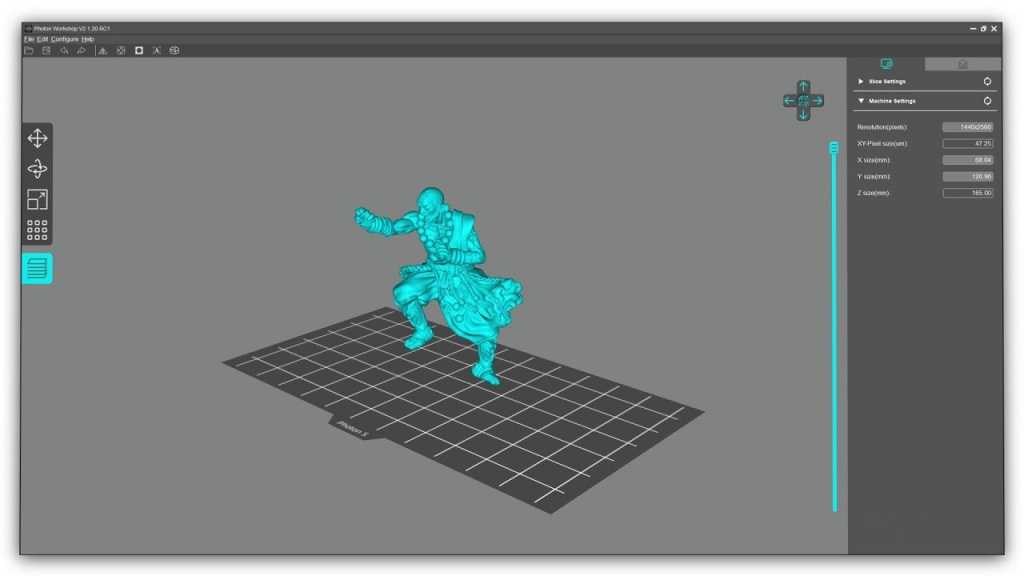
Lychee Slicer helps you to design and build your 3D models easily, slice them with high precision, and provide you with a lot of amazing features including an island detector and real-time visualization of your print.
Download and try the Lychee Slicer today.
Major Features of the Lychee Slicer
- User-Friendly Interface
- Algorithms for Automatic Supports
- Manual Supports
- Supports Many Languages
- Automatic Print Orientation
- Clipping Mode for Real-Time Visualization of the Print
- Built-in NetFabb model-repairing abilities
Pros of the Lychee Slicer
- It analyzes the model and suggest changes that can improve your 3D printing model.
- Fully-automatic means that it can automatically set the print orientation and create its media as well.
- Supports numerous 3D printers including ELEGOO Mars, Anycubic Photon S, Longer Orange 30, and many more.
- Provide users with maximum control over the operations.
- Fast and high accurate algorithms for better slicing and successful 3D printing.
- For auto supporting, just click on the “Generate Automatic Supports” and the slicer will add supports where they are necessary.
- You can set the density of the supports between low, medium, high, and ultra-high.
- Regular updates quickly such as taking on the Anycubic Photon Mono X file type before any other slicer!
Cons of the Lychee Slicer
- Number of features can get overwhelming at first, but it gets easier with a few tutorials
- You will have to buy its PRO version after one month of trial.
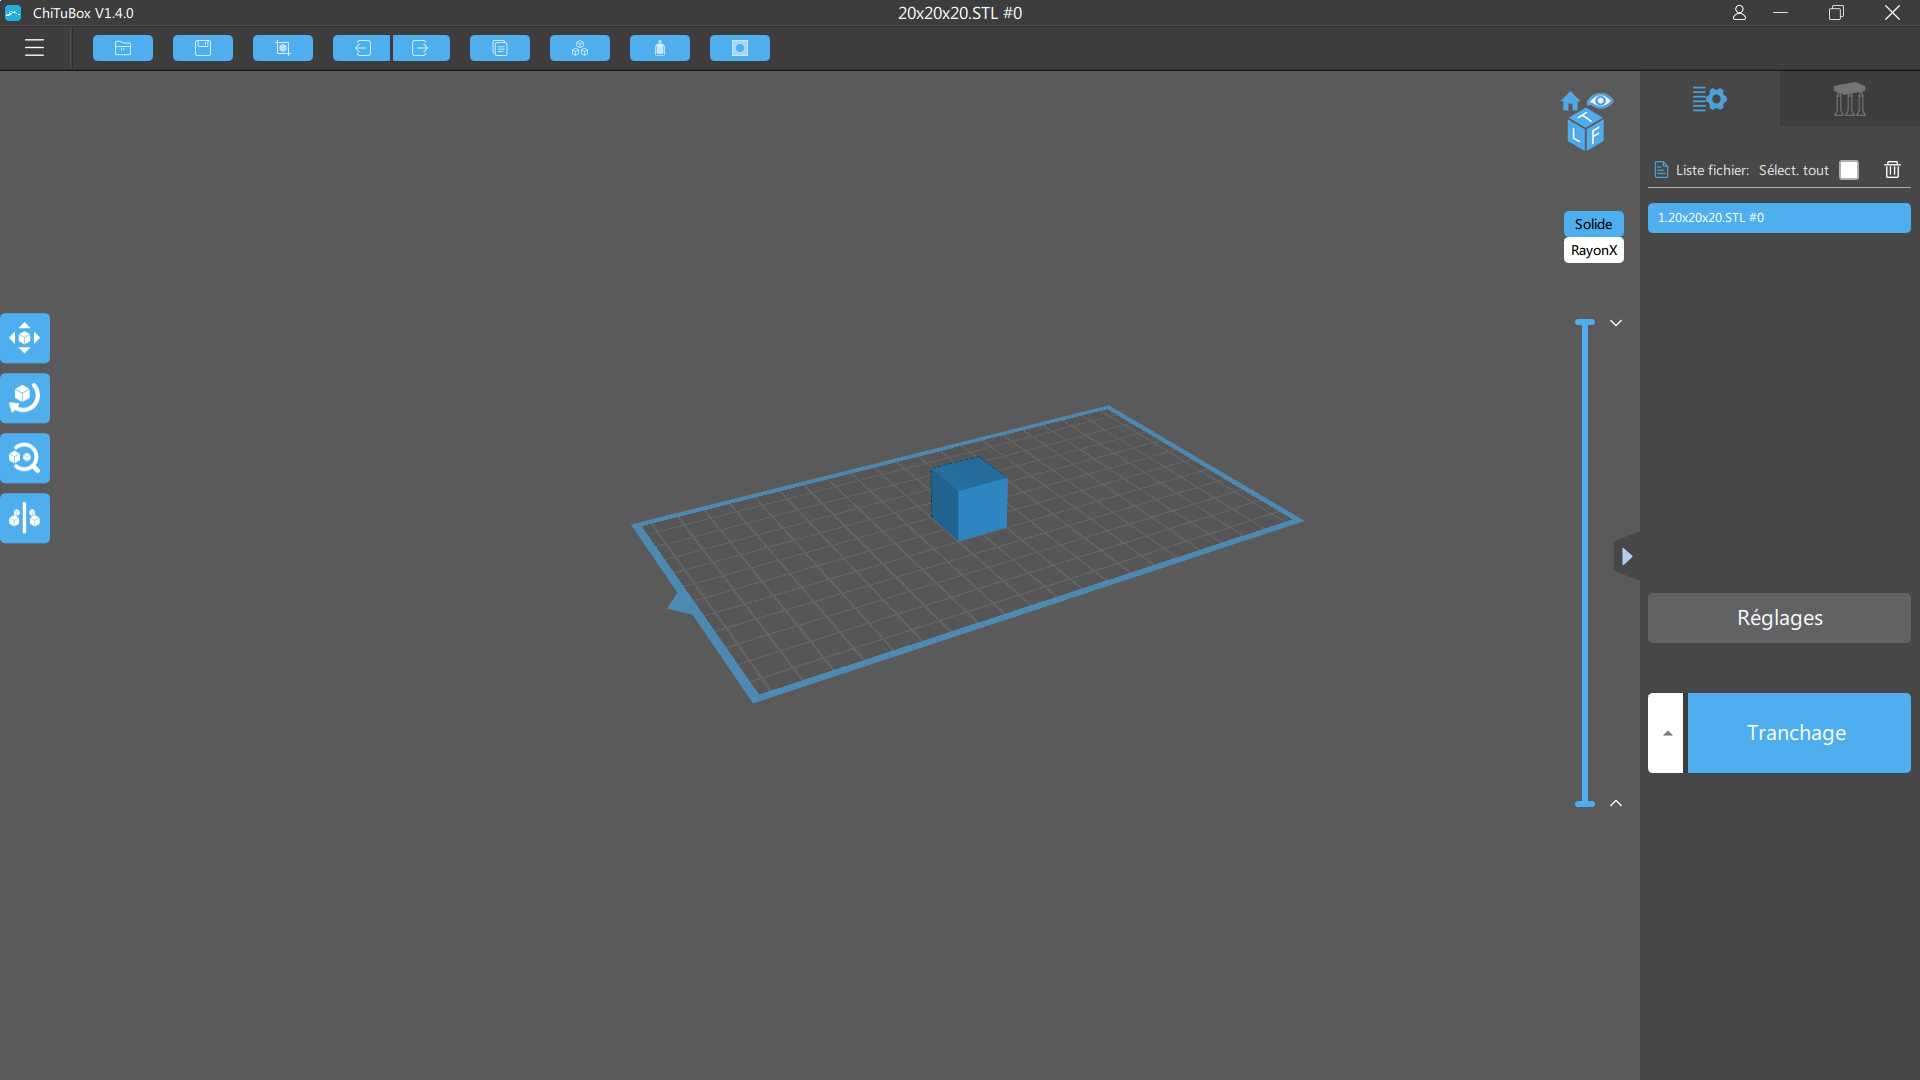
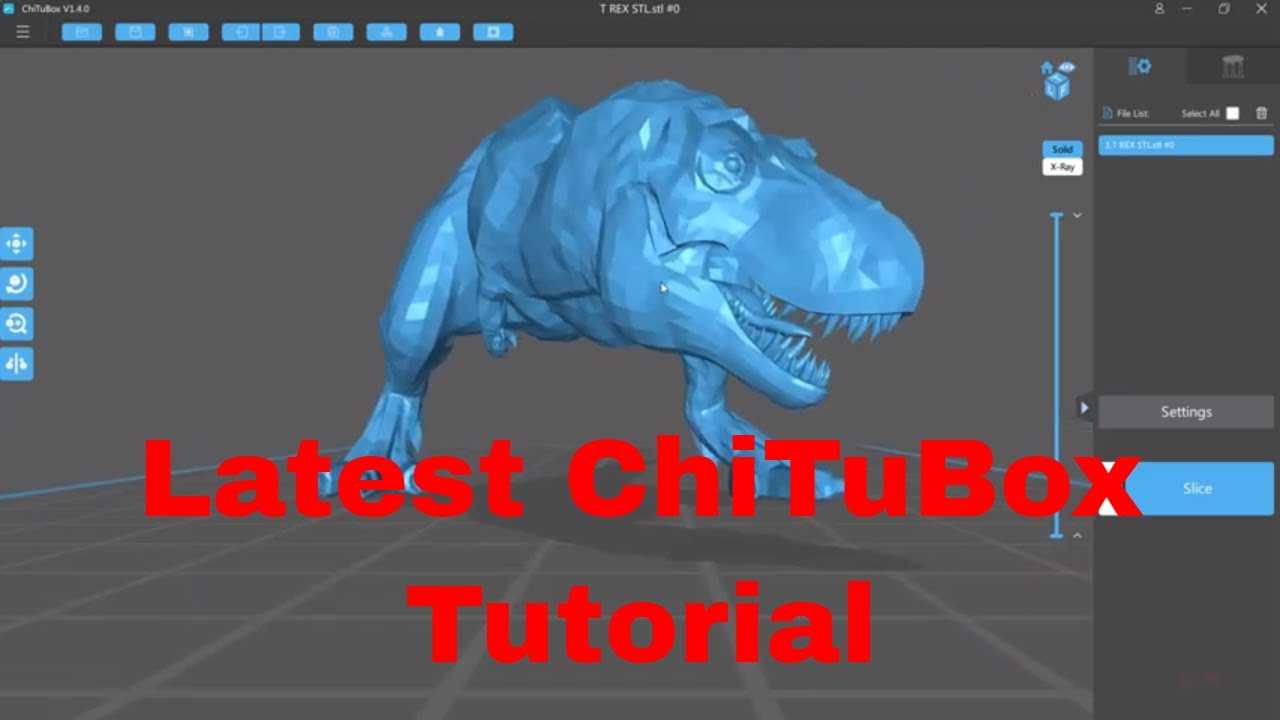
ChituBox Review
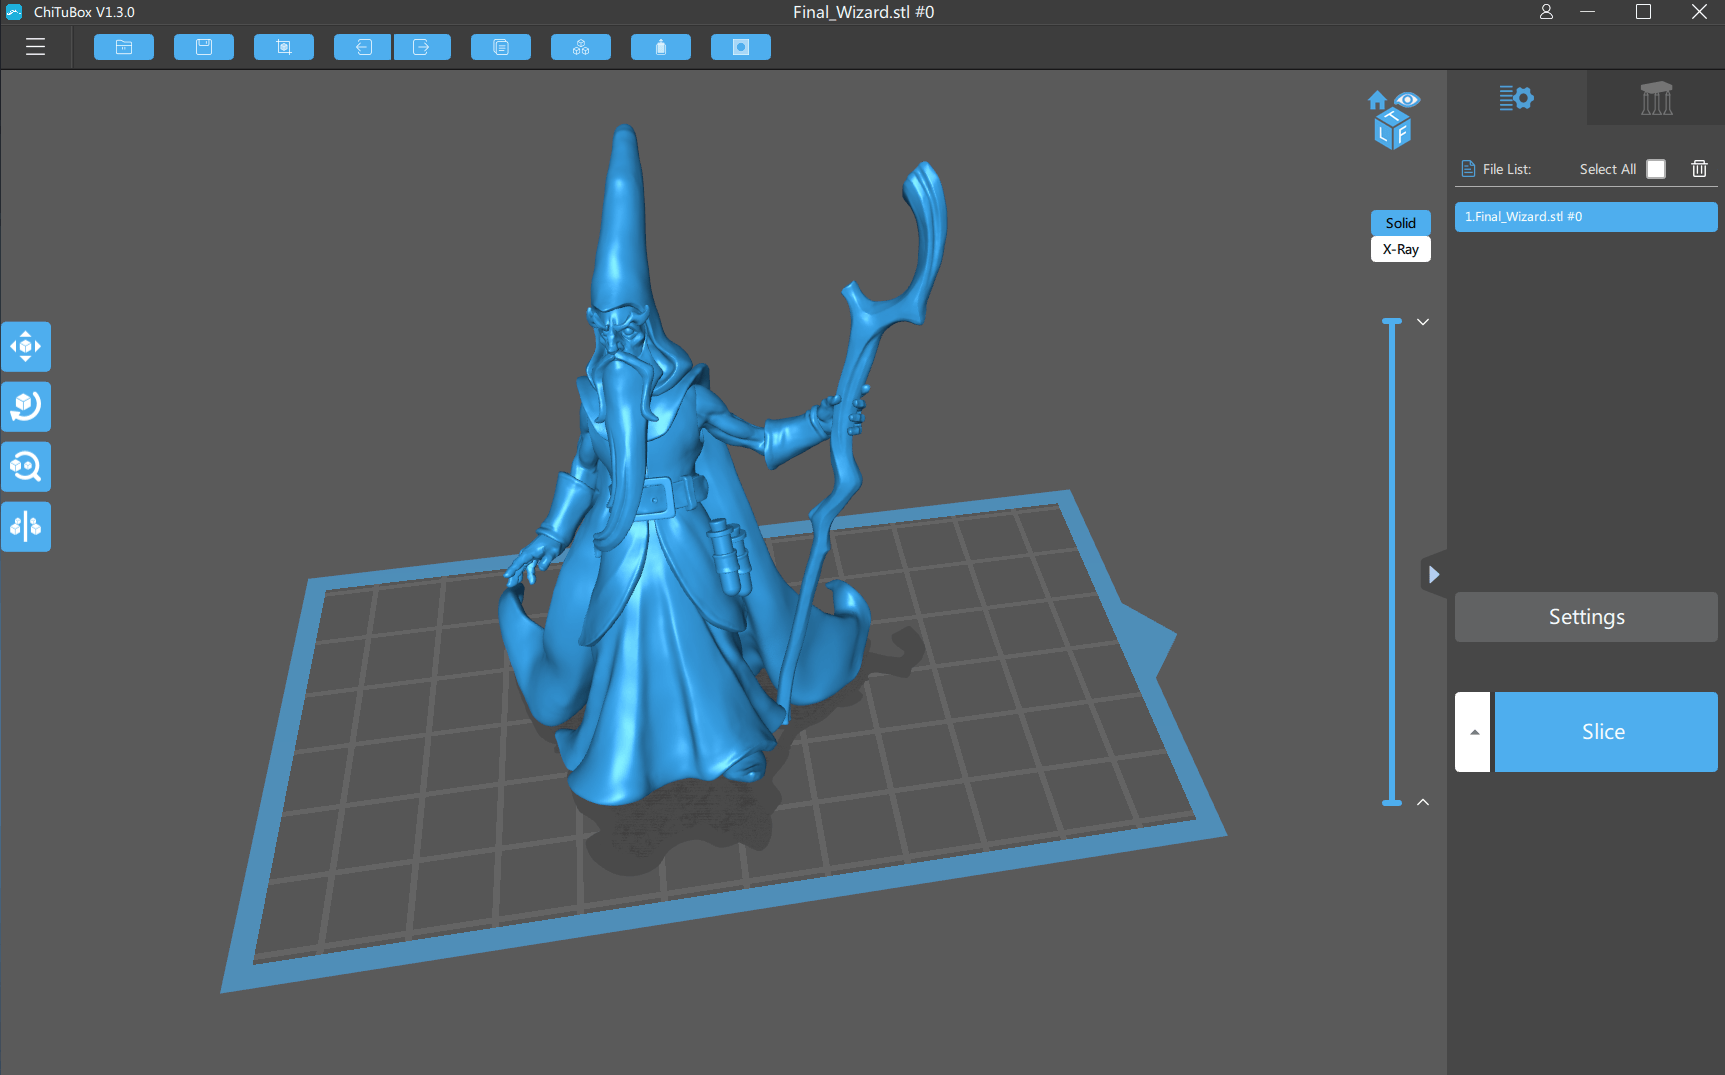
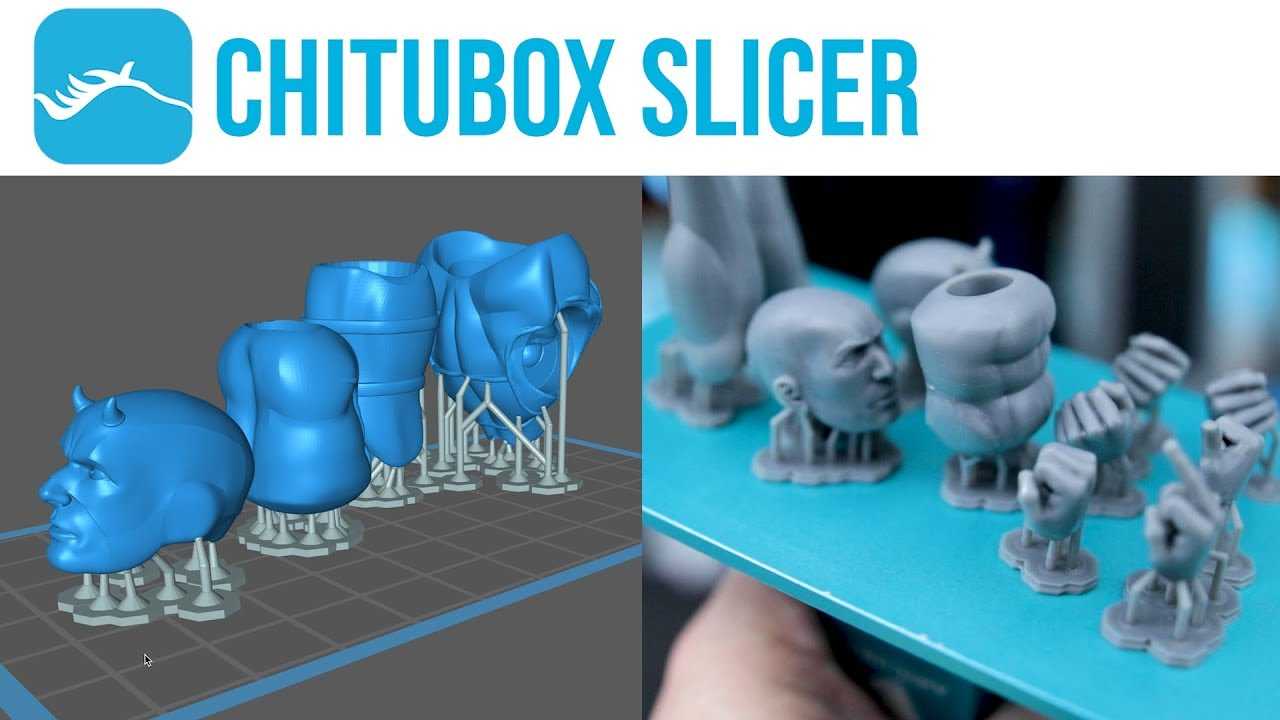
ChituBox is a powerful software, and is quickly becoming the default slicer for resin 3D printer manufacturers to recommend when using their machines. Elegoo, for instance, has fully endorsed this slicer and officially recommends it with their Mars and Saturn MSLA 3D printers. The overall ease-of-use of the ChituBox software and regular updates that include bug fixes, new features, and new machines all point to ChituBox being a resin slicing software with some serious staying power. As new features are released and the software is updated, this article will be updated to reflect those changes so check back to see what’s new!
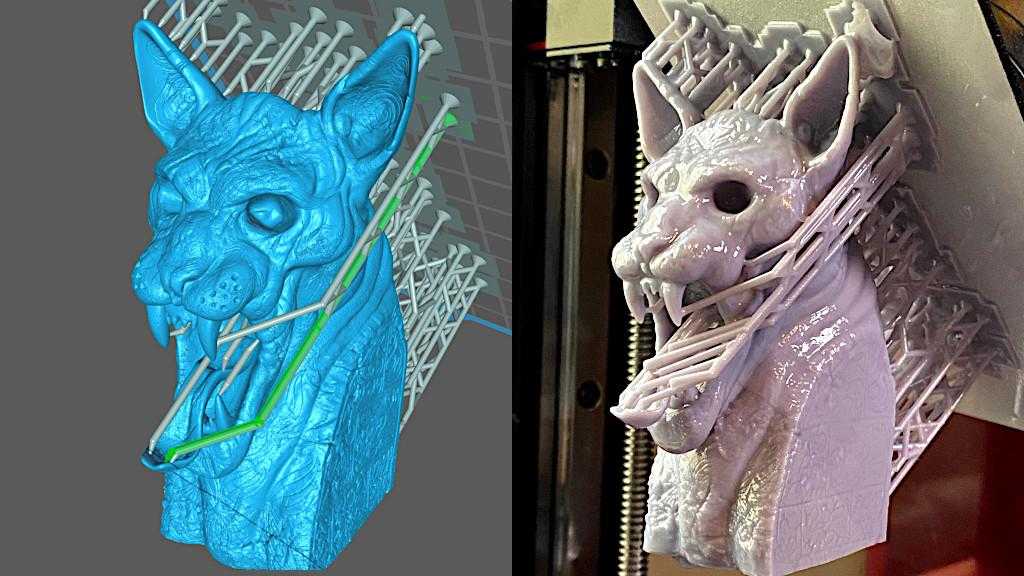
Cat Idol Slicer Preview and 3D Printed (Photo: Andrew Sink)
- Chitubox Official Website
- Read More: Support Settings in 3D Printing – Custom or Tree, Blocker or Enforcer?
ChituBox A Cornucopia of Improvements
ChituBox 1.6.1 provides some, if not the most, important updates in it’s history with this release. Here’s a quick overview of all the changes listed for the release, according to CBD-Tech:
- Added ctb,phz,svgx slice file format
-
New printers added to the machine list:
- ELEGOO Mars Pro
- ELEGOO SATURN
- Flashforge Explorer Max
- Longer3D Orange10
- Longer3D Orange30
- Phrozen Shuffle 4K
- Phrozen Sonic Mini
- QIDI Shadow5.5
- QIDI Shadow5.5s
- Zortrax Inkspire
- Included more recommended resin profiles
- Added indicator colour for model and platform contact surfaces
- Implemented a pop-up window when the imported model is too small
- Added the time display function of editing support
- XYZ coordinate indication map added
- Added small pillar support menu option
- Implemented an underlying preview function of the slice layer
- Added confirmation pop-up to remove all supports
- Partial repair function now included
- Optimised the definition of support density
- Compatibility of drag bar fonts optimised
- Optimised API definitions for plugins
-
Bug Fixes:
- corrected where the slice layer was broken in some cases
- eliminated where manual support could not be added in some cases
- where the model displayed abnormally when zooming in on the window
- corrected how the progress bar close button was occluded in the case of a small window
- Fixed partial translation in Italian
- Bold the rotating and dragging sliders
- Cancellation of the restriction of the mutual conduction slice parameter between different printers
In summary, ChituBox stepped up their game in this update!
Step 2 – Setting Up for Your Printer
I set myself up for successful printing after I installed ChituBox 1.6.1. This meant opening up the settings and selecting the profile for my printer, a Longer Orange 30. If you don’t own one of the 19 printers, CBD-Tech has created profiles for, select “Default” as the printer. From here, you will need to enter the parameters for your specific printer manually. For me, everything was ready to go at this point, including pre-loaded profiles for Longer resin.

If you have an Epax 3d Printer EPAX X1, EPAX X10 2K Colour, EPAX X133 4K Mono, EPAX X156 4K Color and dont have the settings for chitubox go here and it will list all the settings you need
The information entered on the “Print” tab is just as important as what is keyed in on the “Machine” tab. This is where your print can “make it or break it”. Layer Height will determine the vertical quality of your print. In the case of my Orange 30, I can go as low as 0.025. That’s four times the detail of the most common FDM-style printers! Next, we have the bottom layer count. This is just like the “top and bottom layers” settings when using a filament, like PLA or PETG. ChituBox set mine to 6 layers.
Finer Details
After that, we have exposure times. The Bottom Exposure Time will help ensure your print sticks to the build plate. ChituBox had this set to 80 seconds for the Orange 30. Most printers should be set somewhere between 60-90 seconds. The regular Exposure Time will determine the sharpness of the details on the print. Set this too short, and your prints will fail because the layers won’t adhere to each other. Set it too long, and your prints will come out looking like you had your camera focus set incorrectly, causing everything to look blurry.
Finally, we have the remaining settings on the right-hand side, dealing with lift distance and speed. These settings will vary, depending on your particular printer. ChituBox had both lifting ranges set to 2mm, Bottom Lift Speed set to 48mm/min, and Lifting Speed set to 150mm/min for the Orange 30. I recommend checking with social media groups for your specific printer to get settings that will maximise quality, reduce failure likelihood, and provide efficient printing times.
Slic3r
Slic3r – это софт с открытым программным кодом, который используется для нарезки 3Д моделей. Эта программа превосходно зарекомендовала себя в качестве уникального решения. В настоящее время пользователи Slic3r могут в нескольких режимах просмотреть будущую модель и оценить ее.
Slic3r предлагает интересную сотовую вставку. Это образец заполнения, реализованный в трех измерениях, который может варьироваться по слоям. Благодаря такому подходу можно добиваться различных вариантов рисунка заполнения, что в реальности повышает прочность и жесткость готовой модели.
Особенностью Slic3r является прямая интеграция с хорошо известной и многими любимой OctoPrint. Всего лишь нажатием одной кнопки после нарезки моделей они могут быть отправлены в поле данной программы.
Сообщество усердно собирало информацию обо всех материалах, технологиях, проблемах, настройках 3Д печати. Все, что удалось скомпилировать, было реализовано в Slic3r. Программа включает в себя ряд функций, которые в свое время были новаторскими, а сейчас воспринимаются как самыми обычными и неотъемлемыми. Речь идет и о поддержке работы нескольких экструдеров, микроуровнях, краях, обнаружении мостов, переменных показателях высоты слоя, нарезке командной строки, а также расщеплении, последовательной печати и заполнении сотами.
Достоинства Slic3r:
Интеграция с OctoPrint, быстрота работы даже на самых медленных машинах. Работа только с теми деталями, которых коснулись внесенные изменения. Инкрементальная нарезка, просмотр в режиме реального времени в плоскостях 2Д и 3Д. настраиваемая кровать, трехмерная заливка в области сот, настраиваемые параметры давления и т.п. И при всем этом программа совершенно бесплатна.
Slic3r совместима с:
- Windows,
- Linux,
- Mac
Mango Slicer
Mango Slicer is one of the most popular white-label 3D model preparation solutions available in the market. The software is flexible and allows compatibility with a number of hardware platforms.
![]()
A few of the outstanding features of the Mango slicer include; compatibility for beginners and advanced level experts alike. Plus you can manage your own printer and resin library on the browser for free. Moreover, you can export your templates in .obj and .stl modes. Thus, you can directly send these files to your printer via the internet.
Pros
- Provides real-time preview of the completed design
- Resin economical mode algorithms make your printing efficient and economical
- Auto-support features make the design more substantial by adding supports
Критерии выбора 3D-принтера
Имейте в виду! При выборе следует заострить внимание на следующем:
- Объем печати. Для домашнего использования подойдет устройство с небольшой камерой. Принтеры профессионального назначения позволяют печатать более объемные изделия.
- Технология печати. FDM подходит для объемного моделирования простых объектов. SLA, DLP, LCD и прочие обеспечивают более высокую детализацию.
- Тип камеры. Закрытая камера удорожает конструкцию принтера и увеличивает потребление электроэнергии, но дает возможность получать более качественные и точные изделия. Устройства с открытой камерой дешевле, но перепады температур в процессе печати грозят деформированием детали.
- Подогрев платформы. Дает более равномерное остывание модели, предотвращает ее отрыв от стола и расслоение. 3D-принтеры с подогревом платформы стоят дороже лишенных данной опции аналогов.
- Скорость печати. Высокий параметр грозит потенциальными ошибками и низкой точностью моделирования. Для домашнего устройства оптимальной будет скорость от 30 до 40 мм/с.
- Точность печати. Чем выше точность по осям X, Y, тем лучше качество детали. Для домашнего принтера значение 0,1 мм означает весьма точное повторение виртуального шаблона.
- Число экструдеров. Двойные печатающие головки дают больше возможностей, но и стоят соответствующе. По этой причине их преимущественно устанавливают на дорогостоящие профессиональные устройства.
Международные стандарты
Международная организация по стандартизации (ISO) имеет солидный набор эталонных стандартов, которые определяют термины и принципы практически для всего — от спецификаций резьбы до стандартов качества
Это особенно важно в промышленных сферах, где использование одинаковых терминов и понятий является ключом к эффективности.. Что касается 3D-печати, основной источник путаницы заключается в вопросе — следует ли называть всю печать на основе смолы стереолитографией? Ведь это была первая технология
К счастью для нас, ISO / ASTM 52900: 2015 проводит четкую линию.
Что касается 3D-печати, основной источник путаницы заключается в вопросе — следует ли называть всю печать на основе смолы стереолитографией? Ведь это была первая технология. К счастью для нас, ISO / ASTM 52900: 2015 проводит четкую линию.
Вся трехмерная печать на основе отверждения смол, в которой жидкая фотополимерная смола хранится в ванне (в отличие от струйного распыления через сопло), обозначается общим понятием полимеризации в ванне. Все другие названия, такие как SLA, DLP или LCD, являются подкатегориями этой технологии.
Итак, что же отличает три наиболее распространенных вида полимеризации в ванне?
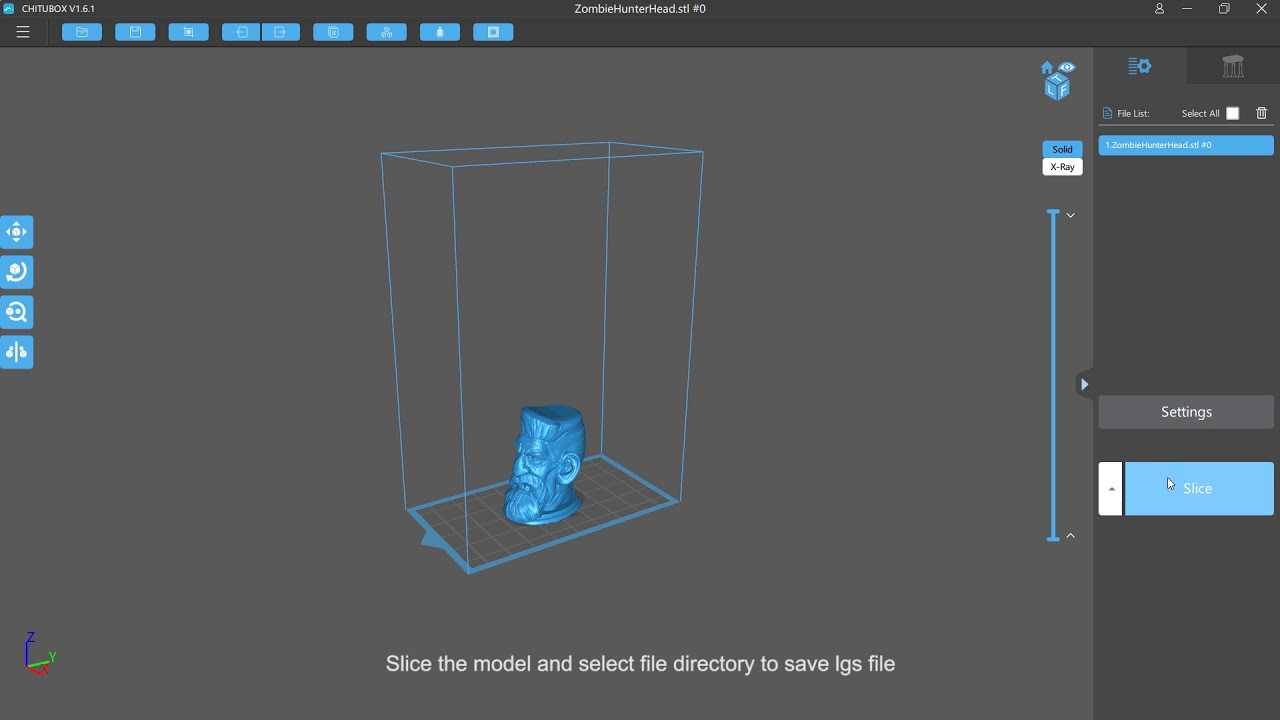
Step 3 – Let’s print something!
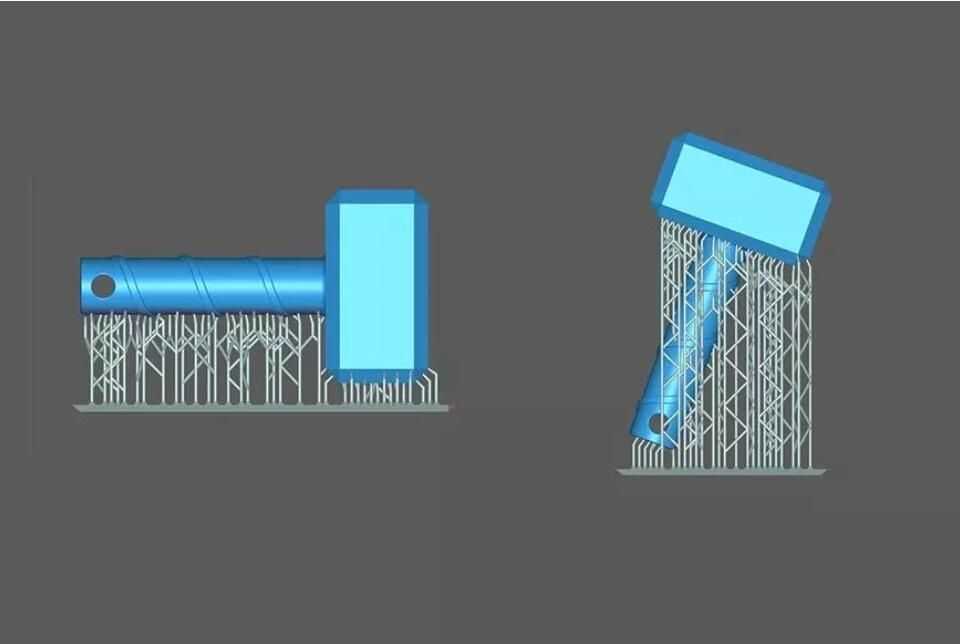
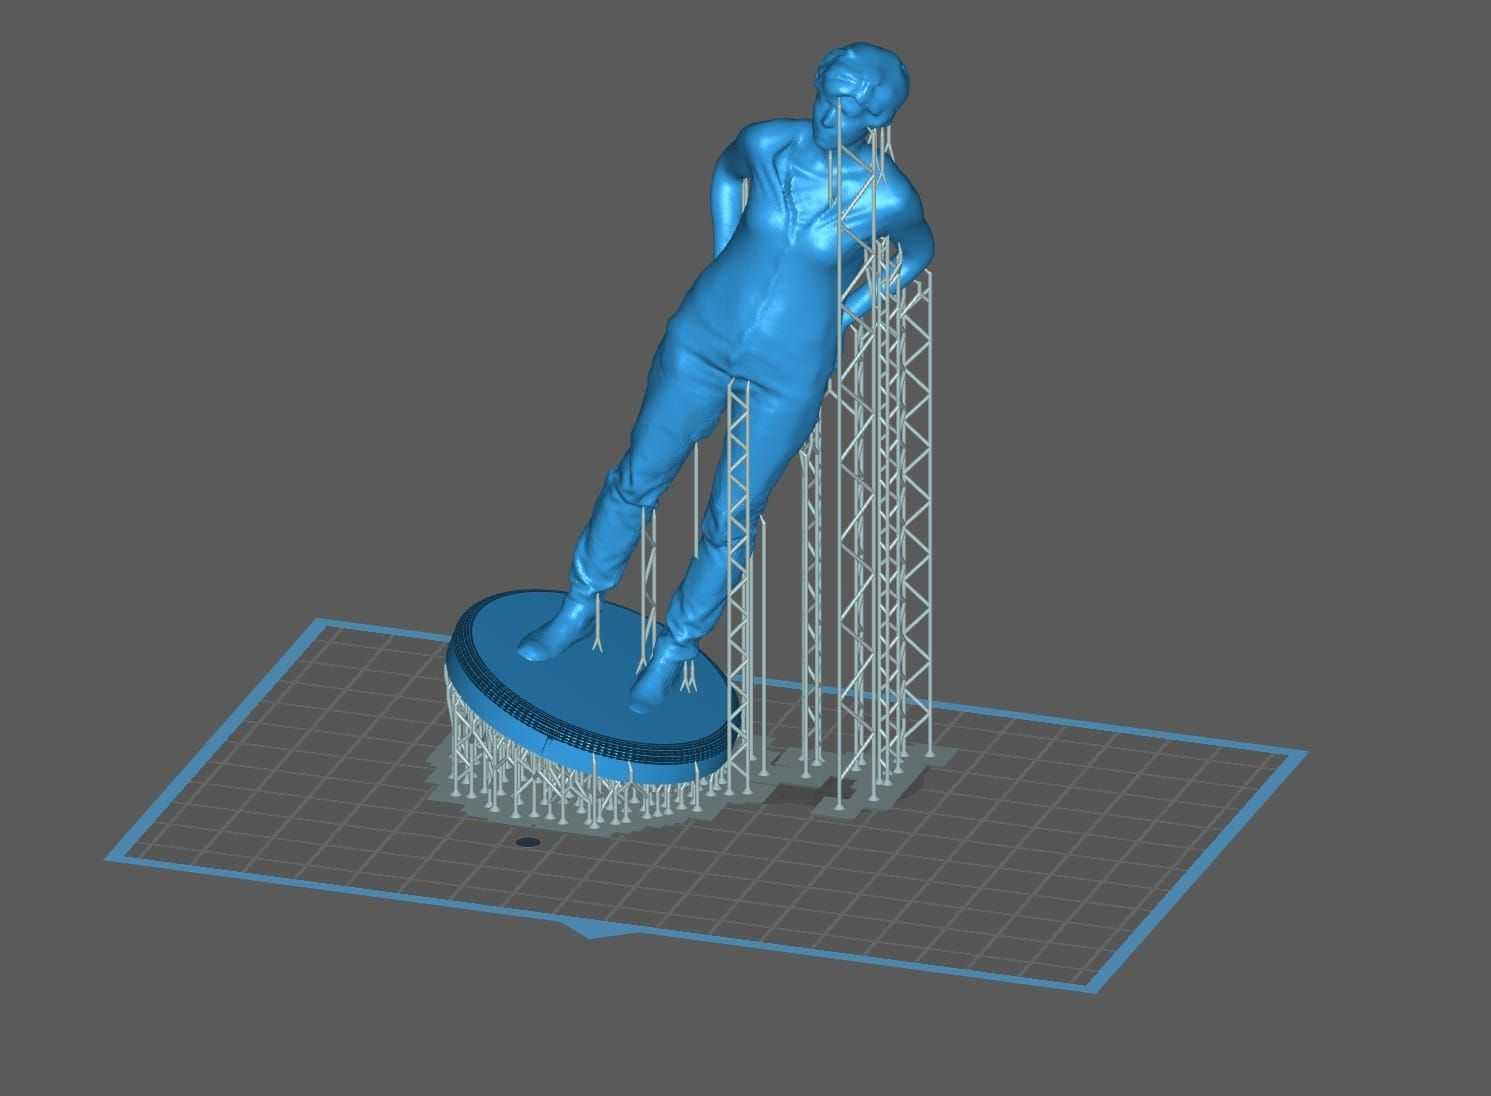
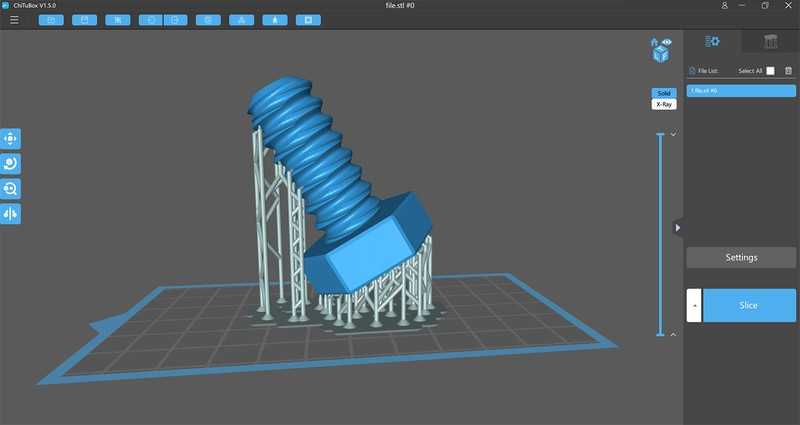
Finally, we get to the fun part! With ChituBox open, load an STL or OBJ file you want to print. Since we are nearing the most beautiful time of the year, I chose a “jolly” little Dwarven Santa by Lance Wilkinson of Epics ‘N’ Stuffs Miniatures. I changed his scale to 200% and rotated him to a 45° angle. I then used two very cool features for saving a bunch of resin. First, I hollowed out the model. Then, I dug two holes at the bottom to allow for the excess resin to drain out. My final step was adding supports. While I won’t go into the details here, it’s important to note that you should make sure there are no “islands” on your print before you slice it. The last picture in the slideshow is an example of what an “island” looks like.
This slideshow requires JavaScript.
* Please note, I am not an expert when it comes to adding supports. I used settings that have worked for me in the past. You may have your thoughts or need to do your research here to get a “perfect” print *
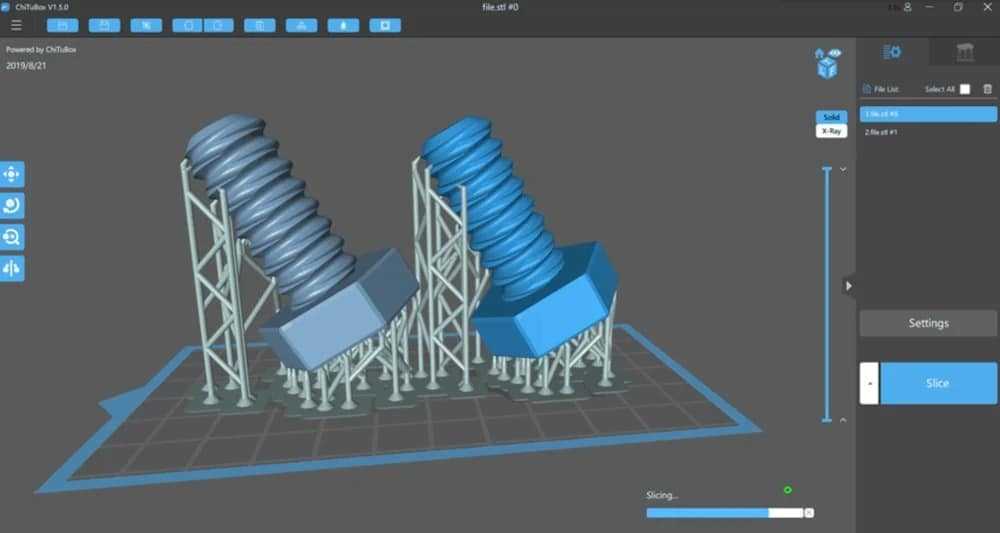
Slice it and go!
After I adjusted some of the supports and deleted others, I clicked “Slice” and watched the magic happen. Once the process was complete, I exported the sliced model to the .lgs format that my Orange 30 reads. Then, I copied the file to my USB stick and plugged it into the printer. Roughly four hours later (yes, the actual time varied from what ChituBox estimated…. but what slicer doesn’t suffer from the same problem!?), I had a fantastic mini staring back at me. All that was left was to complete some post-processing. I washed Santa in 91% Isopropyl Alcohol, removed the supports, and cured him in a home-made station.
There is many other articles explaining about chitubox resin slicer on whats its capable of All3DP Fabbaloo 3Dwork.io
Final Thoughts on ChituBox
I appreciate those of you readers that have made it this far! While it is to be noted that a few users have voiced some concerns about their ability to effectively use the plugins feature, I have found that by carefully following instructions provided by CBD-Tech, most matters can be easily remedied. The company’s support through the challenges as version 1.6.1 has rolled out has been fast and friendly. I am confident that ChituBox is disrupting the Resin-based printing industry in a significant way. I’m also very excited about what future updates will provide. There is of course many other sla resin slicers.
https://youtube.com/watch?v=M479IHs836g
If you like what you read, consider learning more! There are great details about the Longer Orange 30. You can also find out more about E3D’s latest extruder hotend, the amazing Hemera!
Slicer Hollowing Settings
There are many reasons to hollow a model when printing with resin, and ChituBox makes the hollowing process a simple one-click operation that still offers a high level of customization. Hollowing a model creates a part that uses less resin, has thinner cross-sections, and reduces the overall force being applied to the FEP film on an MSLA 3D printer like the Elegoo Mars 2 Pro. Instead of using a secondary program like Blender, Meshmixer, or Solidworks to open the STL and create a hollow shell, ChituBox allows you to hollow a model as part of the print preparation workflow without the interruption of importing and exporting the model.
Slicer Software for Resin 3D Printing – Hollowing Settings (Screenshot: ChituBox)


