Monkeyprint
The Monkeyprint is a pre-processing and print control software for 3D DLP printers. You can manage multiple designs within the same profile and use it over the internet library through a browser.
![]()
Other main features of the Slicer include; model positioning and orientation, auto support generation by your defined parameters, slicing and hollowing of structures. You can install the software for Monkeyprint on Ubuntu 12.04 and 16.04. The installation process is simple but the working and editing of the Slicer features is not as easy as for a few other Slicers. Thus, it is recommended for experts and mid-level enthusiasts who have prior knowledge of using open-source Slicers.
Pros
- Open source and can be edited according to the requirements of the user
- Supported on Linux
- Comprehensive user manual available with the Slicer
Cons
- Ideally suited for experts and enthusiasts who have some prior experience of using open source Slicers
- The interface is very simple and might not interest a few users
CHITUBOX Free
CHITUBOX Free is a powerful, but easy-to-use 3D pre-process software produced by CBD-Tech. The clean user interface makes it easy to get started, even if you are new to it. You will be surprised at the multi-file processing capabilities of CHITUBOX Free during the uploading of 3D models, generating supports and slicing your models. Besides, CHITUBOX Free can automatically arrange print jobs in the 3D printer’s build space for maximum efficiency to ensure parts are printed correctly.
Besides, CHITUBOX Free provides powerful editing functions including hollowing, infilling, cloning, mirroring, scaling to improve efficiency. Support generation can be usually done with a single click in CHITUBOX Free. Also, the function to elaborate support settings provides the best ways to calibrate your supports manually. As a result, the Customized settings allow you to specify options related to slicing your 3D model. Besides, all the slicer processing will be finished in a flash with just one click!. With the preview function, you can check your print layer by layer and know how the 3D printer will construct your object.
Pros:
- Faster slicing speed
- Solid support generation capabilities
- Nice UX/UI
- Rich functions
- Support for exporting.STL
- Compatible with most 3D printers
Cons:
Requires an account to download
If you would like to learn more about Chitubox have a look at this article
User Interface > Creality Slicer vs. Cura
The only major difference between the user interfaces of Cura and Creality Slicer is the design colors – at least at first glance. But even at a second glance, they are extremely similar.
The individual functions are located in the same places on the user interface. For example, the object manipulation tools are on the left side of the screen, the printer, filament, and settings information is at the top of the screen, and the individual print settings can be made in the menu on the right. In addition, the menu bar is identical and the Marketplace also sits in the same place at the top right.
The biggest differences between Cura and Creality Slicer are update discrepancies. Creality Slicer is based on Cura and is updated with new Cura updates. Since this is not instantaneous, Creality Slicer always lags behind Cura and might differ from Cura in the user interface depending on the scope of the update.
Overall conclusions and my recommendation
So let’s wrap this up. The Sermoon D1 uses a direct drive rather than a Bowden extruder like on most of the other Creality machines. I haven’t tested flexible filaments, but a direct drive has a much better chance of extruding flexible materials reliably. The carborundum glass build plate has held up reliably. I’ve used a glue stick for extra adhesion, and that’s worked well.
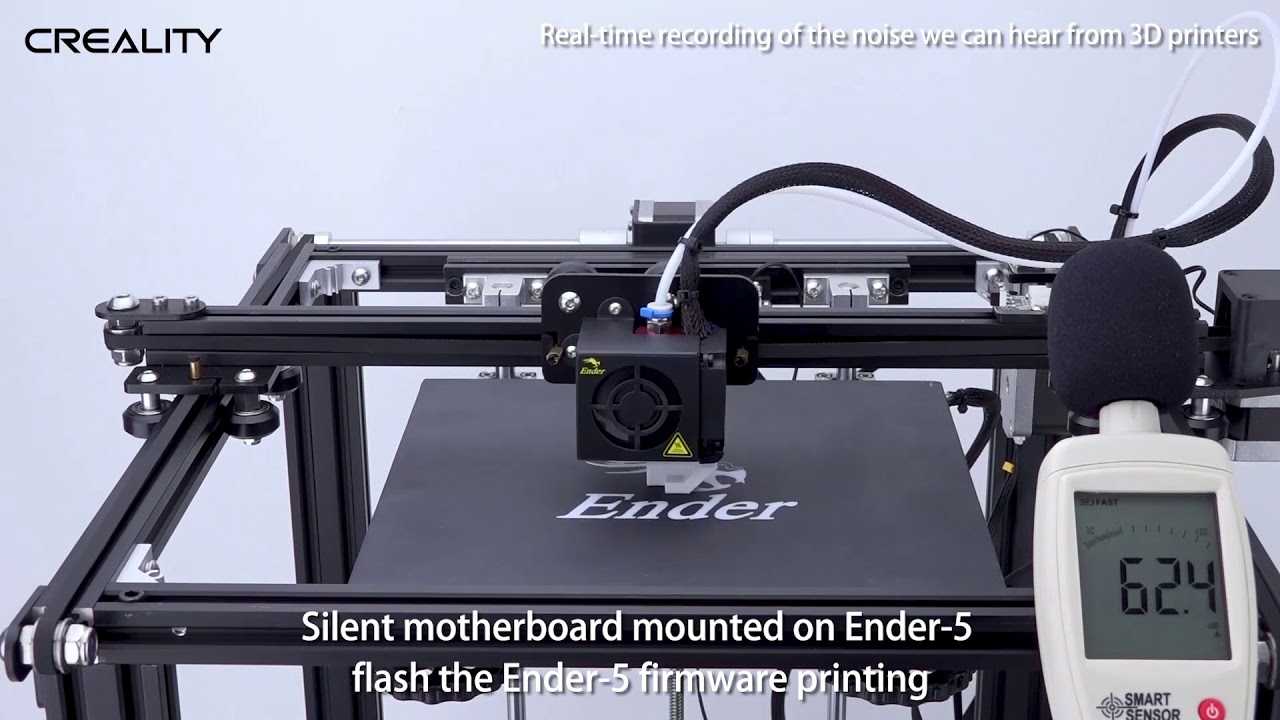
On the positive side, it’s very, very quiet. It’s probably the quietest of the FDM 3D printers I’ve tested. A big part of that is because of its very solid frame. That also probably leads to its reliability, which we’ve seen across many prints.
On the negative side, setup is annoying, and steps are out of order. That could cause failures among those less experienced with building projects — plus, it had a failure that required opening up the machine’s internals to fix. The odd limit on the number of files usable on the SD card isn’t a deal-killer, but it’s annoying. And while we’re on annoyances, the inability to cleanly run a USB cable to the USB port makes it hard to upgrade to OctoPrint.
All that said, the bottom line is this: if you can put up with the quirks and the assembly hassle, it seems to be a solid and reliable printer. I’ve been printing with this pretty constantly over the last month or so and have turned out about fifty items. My wife is using it to print a few models over and over for one of her projects, and the menu, while limited, makes print selection easy.
Once it was tuned, fiddled, and cajoled, it just works.
Conclusion:
Verdict:
So based on our test and print experience, if you ask me if I recommend this product, then my answer is yes. The Ender 3 S1 now becomes our most recommended printer under $400, if you are looking for a low-budget but efficient printer with a direct drive extruder, this one is the best for you.
If you already have an Ender 3 Pro or Ender 3 v2 and are now considering whether the improvements and additional features of the Ender 3 S1 are worth updating, for me the answer is probably also yes, you will get a better printing experience. However, if you don’t want to opt for a newer version, it’s worth trying to revamp and upgrade some accessories and features from the original, although it will cost more in terms of time.
See review on ender 3 s1 from noveltymaker here
Ender 7 review: https://www.pergear.com/blogs/review/creality-ender-7-hands-on-review
Buyer’s Guide – What To Consider In a Resin Slicer
Operating System Compatibility
This point needs little explanation, but it’s one newbies often overlook with SLA software. Always check that your operating system is indeed compatible with a particular slicer, especially premium versions that levy a license fee. You’ll find Windows compatibility in virtually all resin slicers, but if you’re running a macOS and Linux machine, take the time for a cursory check before downloading/paying.
Resin 3D Printer Compatibility
Like the point above, we can’t stress the importance of checking whether a slicer is compatible with your 3D printer. Official slicer websites are a great resource in that respect, often penning comprehensive lists of all compatible resin printers for easy reference.
Price
Commonly, you’ll find the best resin 3D printer slicers available for free, or at least available as a pared-down zero-cost version. Some slicers, like Lychee, incorporate ads to generate income, while others have premium versions with additional features. Expect to pay a monthly subscription fee or a one-off payment for these.
Compatible 3D Printers > Creality Slicer vs. Cura
Cura was developed by Ultimaker and had at the beginning also only for the 3D printers of Ultimaker standard profiles. Meanwhile, however, there are good standard profiles for most available 3D printers in this slicer. Especially for beginners, this is a big plus, because you do not have to build a profile from scratch.
The Creality Slicer is only compatible with Creality and Ultimaker 3D printers. In principle, it is also compatible with all other 3D printers, but you will need to create a blank profile from scratch with printhead settings, printbed size, G-code and extruder settings.
But the standard profiles of the Creality Slicer are very well matched to the Creality 3D printers. Often the profiles are better than those of Cura. So if you prefer to use Cura, it might be worthwhile to take a look at Creality Slicer and transfer the settings to Cura, test and compare them.
Creality Halot Series Resin: Budget Halot One Resin
NEW Light Source Structure: 120W Power Super spotlight. The self-developed integral light source, Precision light control High agility slicing, Creality New Slicing System: A Simplified user interface and Easy Modeling function, and supports the parameter customized High-stability Z-axis for high-quality printing. WIFI-APP intelligent control. Supports Creality Cloud. OTA online upgrade: New Firmware/new system. one-click upgrade. Get better experience in firmware upgrade Smart Operation System -Linux: 64-bit 4-core CPU+GPU Mainboard supports the faster operation and greatly improves printing efficiency. Great Operation Experience: Linux System For a better AI Experience, a 5-inch high definition colorful touch screen keep easy works.
![]()
Frequently asked questions:
Q: How to Upgrade Firmware Creality Halot-One?
A: Upgraded via USB Cable, video guide: https://www.youtube.com/embed/lMORkzUBB8Q Upgraded via Wifi(OTA Upgraded), video guide: https://www.youtube.com/embed/uymYOSwZGq4
Q: why my prints are not sticking on the bed?
A: 1. Please check the bed level of the resin printer. The bed level is needed to parallel to your LCD screen otherwise it is not sticking at all. Check your offset distance between your LCD screen and the build plate, whether there is too much gap between the LCD. Bed leveling guide: https://www.youtube.com/watch?v=yF7F0hPa1EY 2.Whether you have cleaned out your resin vats and there are bits of cured resin still stuck to the bottom chances. If not a bed leveling problem. You need to check that the base layer exposure time that you apply to the first six to eight layers of every print you run. and properly set up your bottom exposure settings. 3. Some resin can stick very quickly like the faster (with 45-50 seconds exposure time). If you use a different kind of resin/different brand resin. We recommend that you can refer to their listing out the setting of the base layer and layer exposure times. 4. The FEP sheet is too loose. Please check whether your FTP tension before messing with your raised height ( during the peeling process) or whether it needs to replace a new one.
Q: How to Upgrade Firmware Creality Halot-One?
A: Upgraded via USB Cable, video guide: https://www.youtube.com/embed/lMORkzUBB8Q Upgraded via Wifi(OTA Upgraded), video guide: https://www.youtube.com/embed/uymYOSwZGq4
Q: What slicer software can be used for Halot resin? Can I use the Chitubox Slicer?
A: Halot Series 3D Printer only supports Halot Box and Lychee Slicer now. Halot Series Resin Printer configured with our Halot Box Slicer (Creality self-development software) and it will be constantly improved and released to our user. And you could also use the Lychee Slicer, now it is compatible. (Support Halot Series: Halot one, Halot Sky, Halot Max)
Z-SUITE
Z-SUITE is Zortrax’s comprehensive slicing and 3D printing farm management software which is optimised for Zortrax Inkspire. Also, it is compatible with third-party LCD 3D printers. As a result, it provides powerful model analysis capability including automatic triangle mesh repair, thin walls detection, overhangs highlighting and overgrowth correction.
With Z-SUITE, lots of editing functions can also be reached like rotation optimisation, hollowing, infilling, splitting, replication, etc. Besides, supports are automatically generated to match the model’s geometry and can be edited manually to prevent failed prints. Above all, Z-SUITE is a wireless command centre of smart, reliable Zortrax 3D printers with Wi-Fi capability. In other words, connect all devices into a 3D printing farm and start working more efficiently.
Pros:
- A one-way operation process
- UX from importing print to slicing it
- Rich functions
- Comprehensive display information
- Embedded with self-built model library
Cons:
- The supported algorithm is average
- The menu layout is not intuitive
- Detail treatments are just so-so
- Only support unauthorised CBDDLP format
- Can’t export.STL
Similar Products:
-
Original Prusa I3 MK3S+
If you are looking for the best consumer machine, you want to get the best printing experience and you are on a good budget, then I recommend you this Prusa I3 Mk3S+.
The Prusa machines are our top Top Picks. The Prusa I3 Mk3S+ is compatible with a variety of consumables and can print more durable supplies; print speed can reach 200+mm/s with little noise; supports automatic leveling, and print quality is excellent. Its disadvantage among these similar competitive products may be the price.
-
Anycubic Vyper
If you want to drop features to save some of the Prusa I3 MK3S+’s cost, and don’t want to break your bank, you could go with the Anycubic Vyper and Artillery Genius, but for effective savings, you could also just opt for the Ender 3 S1.
The Ender 3 S1 remains our first choice for a budget 3D printer. It has everything you need to get started printing at a low cost, and as you print more and more, you will grow to like it.
-
Artillery Genius Pro
Another option is the Artillery Genius Pro, which has many similar features to the Ender 3 S1, and it also performs well in terms of print quality. But unlike the Ender 3 s1, it has a glass printing platform and a plastic extrusion gear, and we also found that the leveling accuracy was not particularly well during auto-leveling. But if you can live with some of these drawbacks, this printer is a good choice, and it is also worth noting that it is the cheapest of several products.
Here I have made some comparisons of the specification information of these four products for reference.
ANYCUBIC VYPER ARTILLERY GENIUS PRO ORIGINAL PRUSA I3 MK3S + ENDER-3 S1 Structural stability I3, dual Z-axis + V-wheel I3, dual Z-axis + V-wheel I3, dual Z-axis + V-wheel I3, dual Z-axis + V-wheel Extrusion system Titan extrusion Titan extrusion Direct drive Direct drive Nozzle and cooling design 260℃+Dual Fans 260℃+Single Fan 260℃+Single Fan 260℃+Single Fan Print volume 245* 245* 260 220* 220* 250 250* 210* 210 220* 220* 270 PLA, TPU, ABS, PETG High-temperature filament(nylon /PC) × × × Printing Platform PEI Spring Steel Carbon silica crystal glass Spring Steel (three types of print surface) PC Spring Steel Automatic leveling Preheating time & hot bed temperature 5 min to 110℃ 80℃ in less than 2 min 6 min to 110℃ 5 min to 100℃ Print speed mm/s <180 Recommended 80-100mm/s Maximum 150 Maximum 200+ Recommended 120 Maximum ≤200 Recommended 100 Resume print function Damaged material detection Power supply Built-in 360W power supply Built-in 450W power supply High quality Delta PSU with power emergency function Built-in 360W power supply Price on Amazon $429 $349 $749 $399 Installation Three-step quick installation 85% pre-installed, 3 minutes Kit + 10 minutes 96% pre-installed + 6-step installation Mrmory cards Large SD card、Micro USB SD card、USB SD card、MIcro USB large SDcard、Type-C US Fan noise 60Dbi 60Dbi ≤45dbi 52Dbi Color Deep Blue Blue Orange Grey
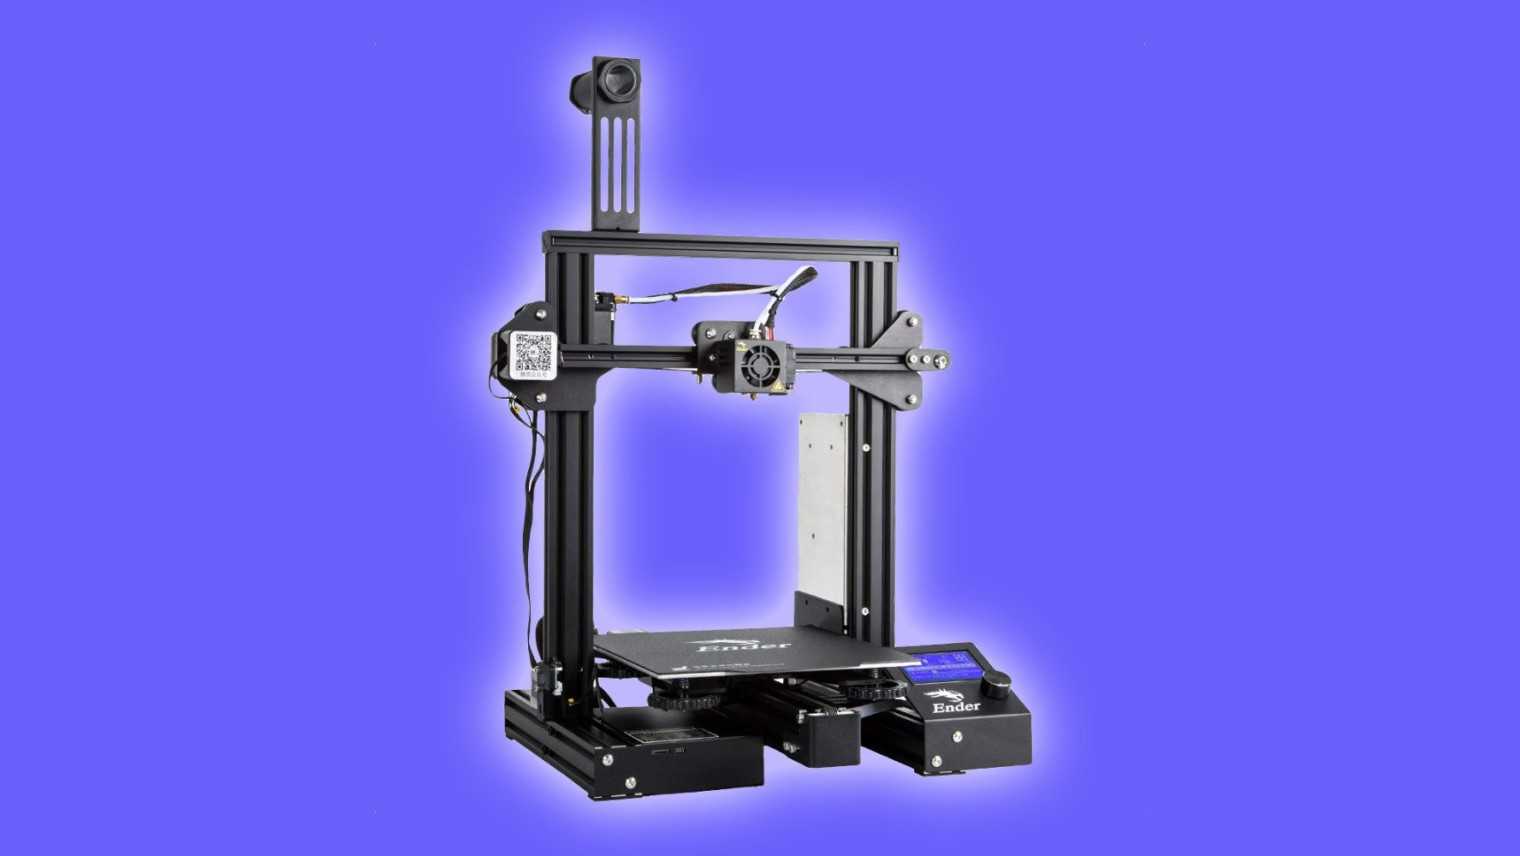
Design & Features
Design:
According to the Creality team, in the name of Ender 3 S1, «S» comes from Creality’s newly developed extruder «Sprite». This new extruder is extruded with metal double gears and has an extrusion force of up to 80N (see the next part for a more detailed introduction).
At the first look, there is not too much difference in the design between Ender 3 S1 and Ender 3 V2, the Ender 3 S1 continues the same dual Z-axis design of the Ender 3 series, despite it has heavier weight and larger volume, but it is visually neater and more pleasant. When Ender V2 was released last year, it was considered as the best looking printer in the ender 3 series, but I think this time the ender 3 S1 may have taken that spot away from it, I am very happy with its exterior design.![]() This time the Ender 3 S1 also retains the tool box where you can put tools and cookies, but the box is more hidden, you can see that the opening is a groove rather than a small round handle.
This time the Ender 3 S1 also retains the tool box where you can put tools and cookies, but the box is more hidden, you can see that the opening is a groove rather than a small round handle.
Поддержка и сообщество Creality Slicer
![]()
Есть также много неофициальных сообществ печати, где вы можете получить информацию и попросить совета, особенно на Reddit. Подразделы 3D Printing News , Ender3 и Creality популярны и активны. Там вы можете найти производителей, которые постоянно помогают друг другу добиваться лучших отпечатков.
Альтернативы
Как мы уже упоминали, альтернатив для Creality Slicer достаточно, прочитать о них вы можете в нашей статье о лучших слайсерах для принтеров .
Лучшие слайсеры для 3D-принтера на русском и английском языке
![]()
Зачем нужен 3D-слайсер?
Для того, чтобы напечатать объект в 3D, нужно сначала создать математическое описание объекта, а затем объяснить принтеру как его печатать. Чтобы 3D-принтер распознал описание объекта, его нужно разложить на слои — перевести в G-код. Как раз этим и занимаются 3D-слайсеры, они нарезают объект на слои, из которых 3D-принтер создает физическую модель. Название программы пошло от английского слова «to slice», «нарезать». Результат работы слайсера — G-код, в котором отражены все параметры печати.
Качество слайсера влияет на результат работы зачастую даже больше, чем качество 3D-принтера. Программ-слайсеров существует много, некоторые из них бесплатные, некоторые переведены на русский язык. В статье вы найдете ссылки для скачивания и интересные видео.
В конце статьи есть сводная таблица 3D-слайсеров, которая поможет с выбором подходящего ПО.
Давайте рассмотрим наиболее популярные программы.
Lychee Slicer
The Lychee Slicer is another best LCD DLP resin slicer offered by Mango Slicer. Unlike a lot of other Slicers, this Slicer has a price tag to it. However, you can use it as a trial version for 1 month before deciding to purchase it.
![]()
The main advantage of using Lychee Slicer is that you can use it with a lot of printers. Furthermore, the interface is very easy to use and makes it possible for you to use it easily. Furthermore, there are fully automatic modes that enable you to sit back and relax while the Softwares makes necessary amendments to the design.
Pros
- Auto-mode has a powerful algorithm to suggest changes that improve your design
- Compatibility with a lot of printers and hardware devices
- Gives a higher level of control to its users
Price & Specs
Specs:
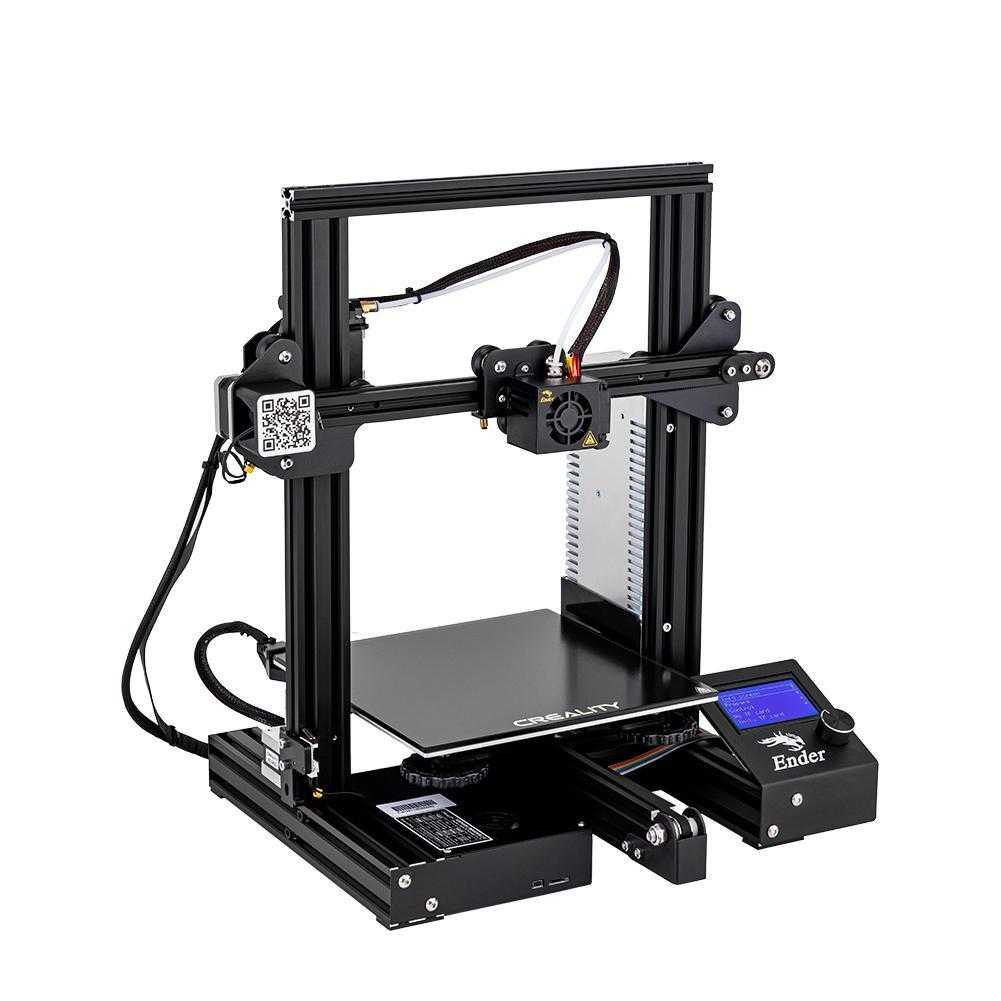
The properties of Ender 3 S1
| Technology: | FDM |
|---|---|
| Printing size: | 220x220x270mm |
| Machine size: | 487x453x622mm |
| Machine weight: | 9,1 kg |
| Extruder | Extruder Direct Drive |
| Printing Speed: | 150mm/s, recommended 60-100 mm/s |
| Filament: | 1.75mm PLA, TPU, PETG, ASA, SILK, ABS |
| Input : | AC 100-120V AC 200-240V 50/60Hz |
| Output: | DC 24V |
| Total Power: | 350W |
| Layer thickness: | 0.1 mm — 0.4 mm |
| Nozzle diameter: | Standard 0.4mm |
| Precision : | ±0.2 mm |
| Format file: | STL, OBJ, AMF |
| Highest nozzle temperature: | 260℃ |
| Highest printbed temperature: | 100℃ |
| Toolbox: | Yes |
| Printing platform: | PEI magnetic build plate |
| Slicer sofware: | Cura/Simplify 3D/Prusa slicer/Repetier-Host |
| Touch screen: | 4.3 «Color Touch Knob Screen |
| Working mode | Memory card offline or online printing |
| Resume printing after power failure: | Yes |
| Filament sensor: | Yes |
| Dual Z-axis screws: | Yes |
| Auto bed leveling: | CR touch |
| Language: | English |
| Computer operating system: | Windows XP/Vista/7/10/MAC/Linux |
Incorrect assembly instructions
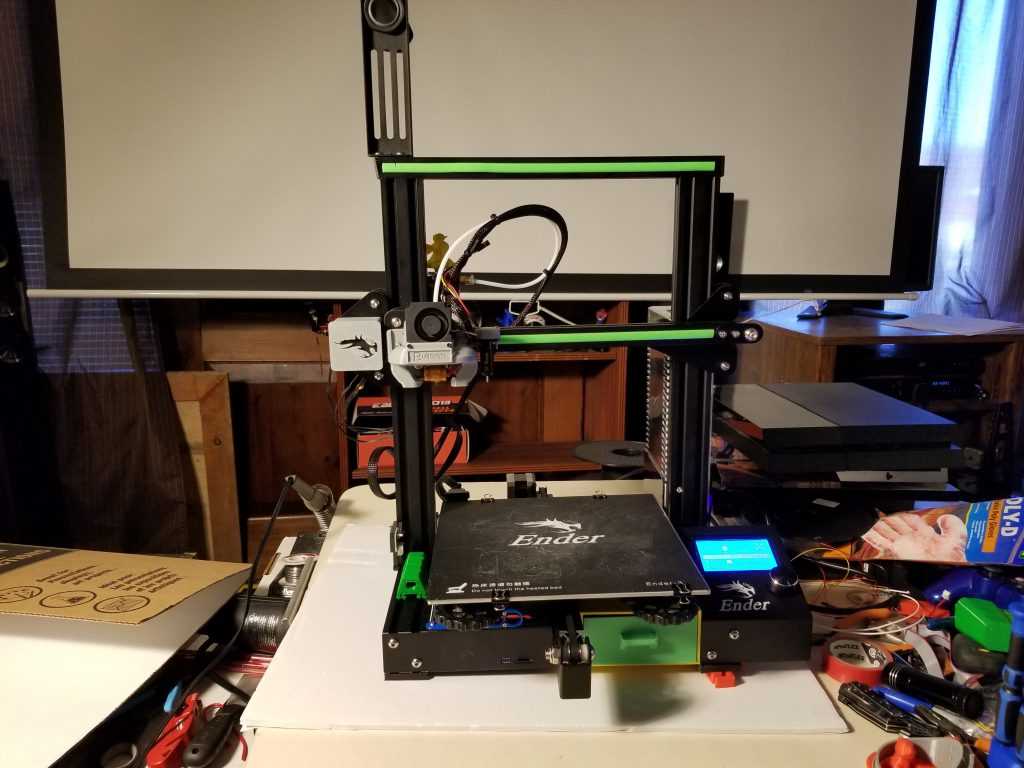
I opened up the directions. Little did I know that they were going to be the bane of my existence for the next three hours as a number of things were instructed to be assembled in the wrong order. That said, I was happy to see that all the screws and bolts were marked so that I knew which was which.
First, I assembled the four vertical posts that hold the printer together.
Then I came to the main build challenge, where the instructions got the order backwards. The instructions tell you to put the center towers up, and then mount the build tray to them, and then somehow lift up the build tray while attaching both the towers to the base and the vertical screws into the towers, all while somehow balancing the build tray.

This turned out to be a bad idea.
I wound up removing the bed assembly, putting the lead screws in first, and then remounting the bed assembly on top, which worked out really well. I then just rotated the lead screws to lower the bed assembly. I know; it makes your head hurt. But if you watch the video, you’ll see what I mean.
By contrast, mounting the top was simple. It was just a matter of putting it in place and screwing it down.
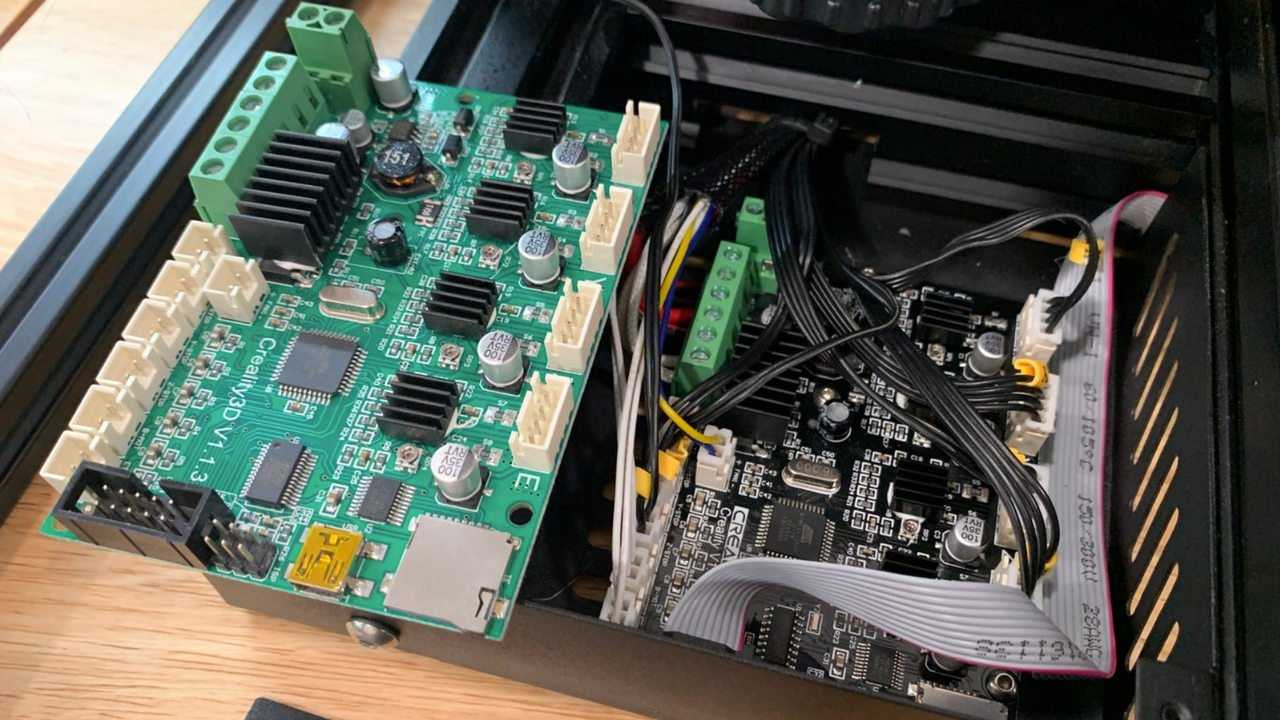
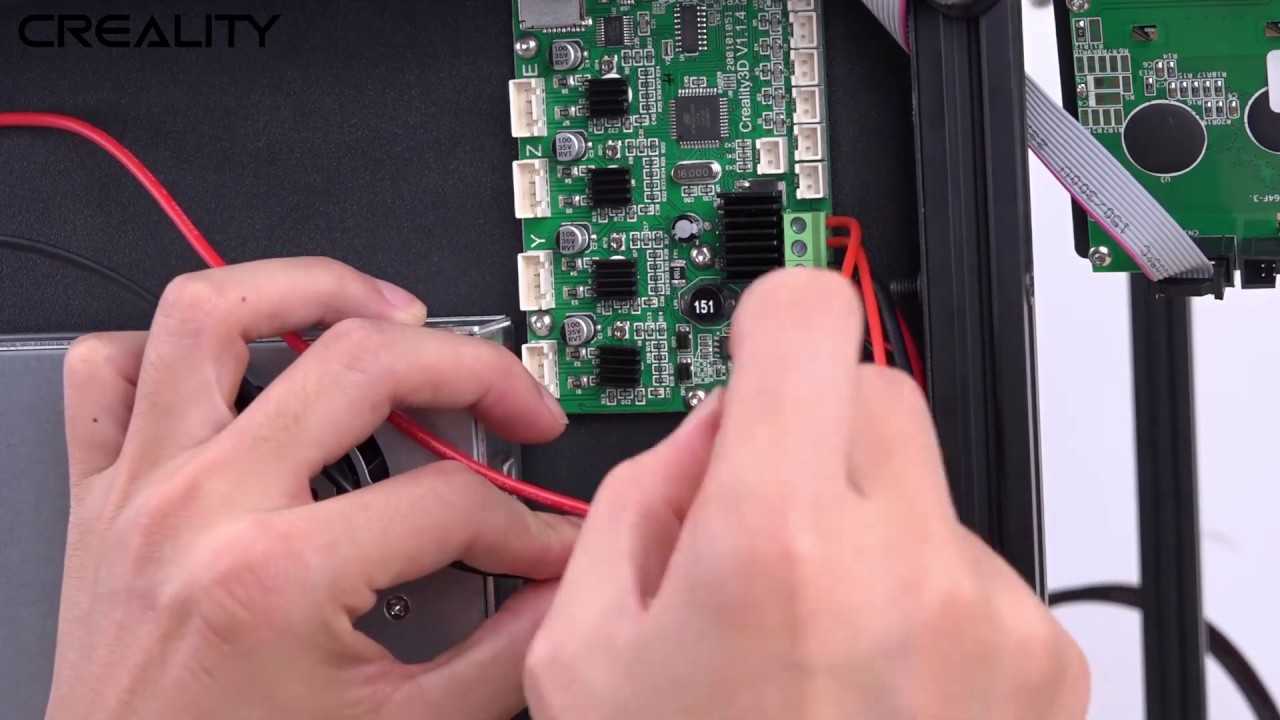
Hooking up the electronics was pretty straightforward. The cables were labeled well and fit together nicely, so that was just a very simple matter of plugging the plugs in where they belong.
Like the much more expensive Ultimaker printers I’ve previously reviewed, this printer is enclosed on five of the six sides. So next, I installed the plexiglass side panels.
The other big gotcha of this build is when the instructions suggest you put on the back panel. The manual tells you to put on the back panel after you put on the first side panel, but that’s incorrect. Instead, put on both side panels first, do all the fiddling you’ll need to do with wiring and connecting up the spool holder, and then put on the back panel.
I wound up taking the back panel off again, doing what I needed to do and then putting the back panel back on. I found that taping the panels in place made it much easier to avoid dropping them on the floor. And yes. I did. The front-hinged plexiglass doors went on with no problem at all.
The last assembly step was putting on the end caps, and then we’re all done.
Almost.
Несколько 3d принтеров в Creality Slicer
![]()
Если вы хотите добавить дополнительную машину, выполните следующие действия:
- Перейдите в «Машина » и выберите «Добавить новую машину» (см . Красную цифру «2 » на изображении выше).
- Вы должны увидеть тот же начальный экран, который вы видели при первом запуске программы.
- После выбора машины программа откроется снова и нужно будет добавить новую машину.
Если у вас более одного 3d принтера, переключение между машинами происходит плавно:
- Перейдите к Machine (см . Красную цифру «1 » на изображении выше) на панели инструментов.
- Выберите машину, с которой хотите работать и настройки изменятся.
PreForm
The PreForm is Formlabs’ free software that uses advanced, proprietary calculations to generate supports and optimise print settings for each printed part. Above all, it’s primary functions are scale, orientation, support, and layout. Also, these features combine into one workflow with the one-click print feature. You can select multiple printers and easily upload your print using Wi-Fi.
Pros:
- Simple operation process
- Meets most of the basic requirements
- Excellent automatic support
- Prompt guidances in place
- A nice fit for Formlabs printers
Cons:
- The degree of freedom and openness is not that high
- Unable to export.STL so that non-device users can’t use it
PrusaSlicer
PrusaSlicer (formerly known as Slic3r Prusa Edition or Slic3r PE) is best LCD DLP resin slicer and Prusa’s own in-house developed slicer software based on the open-source project Slic3r. After that, with the release of their Original Prusa SL1 Resin 3D printer in 2018, they’ve added masked SLA (MSLA) mode into PrusaSlicer.
PrusaSlicer provides various editing functions such as scale, rotate and especially cut prints. Supports can be generated automatically and then edited manually under “points” mode. Besides, various settings include print, material, printer are available too.
Pros:
- Years of iteration from FDM experience
- A relatively large user group of 3D printers
- Clear UI
- Mid-level supporting algorithms
- Support for exporting.STL
Cons:
- Old-style UI
- The current functional details for SLA
Conclusion > Creality Slicer vs. Cura
If you need a slicer for your Creality 3D printer, the Creality Slicer is very suitable. It offers you, depending on the update, most of the features that Cura also offers. Sometimes the default profiles for the Creality 3D printers are better in Creality Slicer, but sometimes there is more choice in Cura.
Overall, Cura is the better slicer because it serves as a template for Creality Slicer, is always more up-to-date, and offers more freedom.
However, for starters, Creality Slicer is a very good choice and switching to Cura is extremely easy as the user interface and features are almost identical.
Disclosure: This website is the property of Martin Lütkemeyer and is operated by Martin Lütkemeyer. Martin Lütkemeyer is a member of the Amazon Services LLC and other Affiliate Programs. These are affiliate advertising programs designed to enable websites to earn advertising revenue through advertising and linking to Amazon.com and others. Links marked with * are affiliate links.
NanoDLP Slicer
The NanoDLP slicer is another best LCD DLP resin slicer that will give you great features for SLA/SLS/DLP 3D printing. This Slicer is compatible with all the operating systems like Windows, Linux, Mac, and Raspberry Pi. Thus, the Slicer is one of the most compatible and rugged ones in the market. Here are a few of the amazing features of the NanoDLP that you must know about.
![]()
The functioning is smooth, including working on Raspberry Pi. Furthermore, the Slicer contains many features like dimming, hollowing, infill, and AA support. The slicer acepts STL, SLC, SVG, OBJ and PNG type files, its not just a slicer you can use also use it to control your 3D printer.
Pros
- Compatible with a large number of hardware and platforms.
- Provides smooth transitioning features on the Raspberry Pie
- Improved print quality
- Free
Cons
- The model cannot be rotated in discreet steps
- Rendering is based on the browser which often slows the process
Need help installing NanoDLP on the wanhao duplicator 7 or any other printer have a look at this article.
Cura > Creality Slicer vs. Cura
Cura is one of the most popular slicers around. It is free to download, offers an easy start for beginners and many options for experts. The mix of ease of use, compatibility with most 3D printers and the many options to optimize 3D prints makes this slicer extremely successful.
You can feed Cura with 3MF, OBJ and STL files, look at a simulation of the print and get an estimate for the duration of the print and the material consumption.
The ability to show or hide different settings in Cura transforms the slicer from a beginner’s software to a tool for experienced users in just a few clicks. With features like Wire Mode, Tree Supports and the popular Vase Mode, Cura often stands out from other slicers with ease of use and great results.
Finding the optimal settings for your 3D printer is not difficult with Cura. There are standard profiles for most available 3D printers that provide a good starting point for further optimization. Many settings are also linked to each other so that a change also automatically changes dependent settings and displays this. For example, if you change the line width, the settings of the line widths of the infill and skirt will be adjusted immediately.
Cura not only has standard profiles for other 3D printers but also plugins from other companies or users that can be integrated via the Marketplace. For example, you can add calibration objects for temperature, retraction or print bed leveling via a plugin or make Cura compatible with third-party programs such as SolidWorks, Blender or Catia.
I myself mainly use Cura for all my FDM 3D printers.
- Price: Free
- Download: Ultimaker
- Suitable for: Beginners to experienced users
- Operating system: Windows, iOS, Linux
PRO:
- Very popular, large community
- Regular updates
- Simple operation
- Lots of print options
- Supports plugins
- Free
- Supports all popular 3D printers
CON:
Not included on USB sticks of Creality 3D printers – extra download required
That helpful G-code
In 3D printing (and many other industrial applications), G-code directs the hardware on moving. In order to properly start and stop a print on the Creality Sermoon D1, you’ll need to insert this G-code into your Cura slicer profile:
Start G-Code:
M201 X500.00 Y500.00 Z100.00 E5000.00 ;Setup machine max accelerationM203 X500.00 Y500.00 Z10.00 E50.00 ;Setup machine max feedrateM204 P500.00 R1000.00 T500.00 ;Setup Print/Retract/Travel accelerationM205 X8.00 Y8.00 Z0.40 E5.00 ;Setup JerkM220 S100 ;Reset FeedrateM221 S100 ;Reset FlowrateG28 ;HomeG92 E0 ;Reset ExtruderG1 Z2.0 F3000 ;Move Z Axis upG1 X10.1 Y20 Z0.28 F5000.0 ;Move to start positionG1 X10.1 Y200.0 Z0.28 F1500.0 E15 ;Draw the first lineG1 X10.4 Y200.0 Z0.28 F5000.0 ;Move to side a littleG1 X10.4 Y20 Z0.28 F1500.0 E30 ;Draw the second lineG92 E0 ;Reset ExtruderG1 Z2.0 F3000 ;Move Z Axis up

End G-Code:
G91 ;Relative positionningG1 E-2 F2700 ;Retract a bitG1 E-2 Z0.2 F2400 ;Retract and raise ZG1 X5 Y5 F3000 ;Wipe outG1 Z10 ;Raise Z moreG90 ;Absolute positionningG1 X0 Y0 ;Present printM106 S0 ;Turn-off fanM104 S0 ;Turn-off hotendM140 S0 ;Turn-off bedM84 X Y E ;Disable all steppers but Z
FAQs
Is It Worth Paying For the Premium Version of a Particular Slicer?
The answer depends on your printing goals and, more specifically, whether advanced features that you’re likely to use are restricted in the slicer’s free version. Beginners won’t benefit much from advanced features and, if anything, adding further unnecessary complexity steepens the learning curve.Another point to consider is whether those same pay-walled features are available as part of the free version of another slicer as standard. 3D printing is an expensive pursuit as it is, so we recommend saving costs and opting for versatile free resin slicers like ChiTuBox.
Are Native or Third-Party Slicers Best?
Native proprietary slicers like Anycubic’s Photon Workshop are excellent options for convenience. These tend to work out of the box. Printer manufacturers go to considerable lengths to fine-tune the software to work with little hassle with a particular focus on a user-friendly experience. Should you want more freedom and a broader range of advanced features, third-party slicers are an equally viable option. Ultimately, it comes down to personal preference and what type of experience you’re looking for from the best resin 3D slicers.
Can You Use Cura With Resin 3D Printers?
Unfortunately, as a general rule, Cura is geared for use with FDM printers and won’t work with resin 3D printers. There are a handful of outlier printers that could theoretically function with Cura, but the most popular resin printers, such as the Photon and Elegoo Mars ranges, require dedicated resin slicers.
What Are the Main Differences Between FDM and Resin Slicers?
At a fundamental level, FDM and Resin slicers are similar in that they are tools to prepare a part or model for printing. They differ in how they adapt the slicing process to the underpinning technology, i.e., Fused Deposition Modeling and resin (SLA/DLP/LCD). Without delving too deeply into specifics, a slicer adapts to the resin process by generating stacks of images with specific curing instructions. Each one of these stacks directly relates to the layers on the final printed model or parts. On the other hand, FDM slicers rely solely on G-code to provide instructions to the printer.
If you enjoyed this article:
![]()


